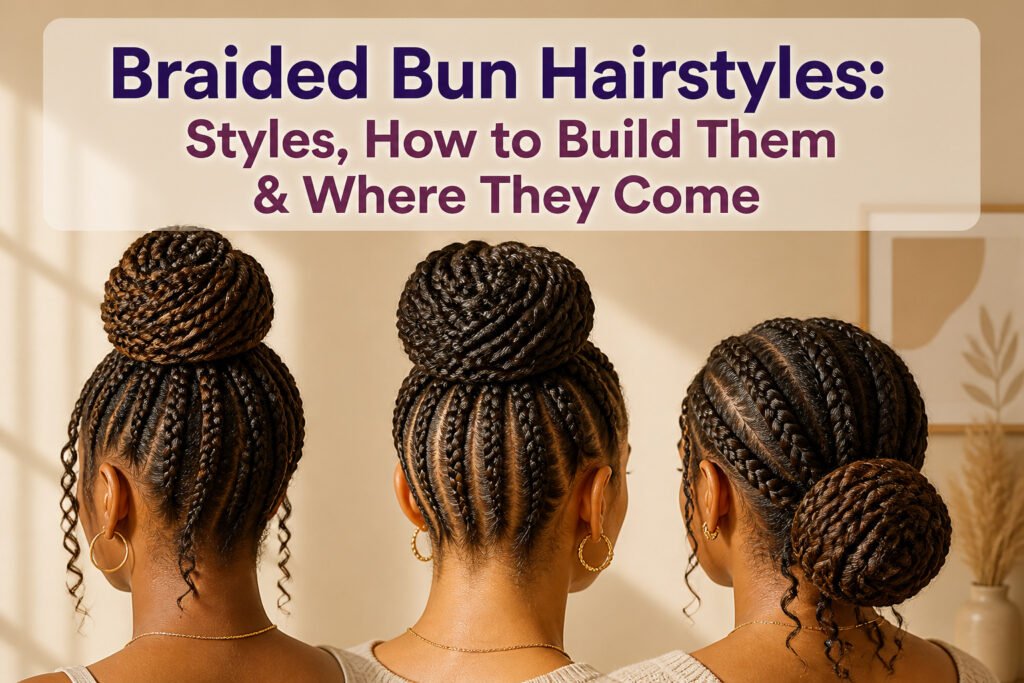
Braided bun hairstyles are updos built from cornrows, box braids, flat twists, or stitch braids gathered and coiled into a bun, with the braiding technique determining how the style holds and where it sits on the head. The catch is placement: a cornrow bun set too high leaves loose curls at the nape looking accidental rather than intentional, while the same style positioned at the lower crown lets those curls fall in a deliberate arc. Most builds that survive a full day wrap the braid tail ends around a base rather than pinning flat, since pins work loose where multiple braids converge.
1. Cornrow Bun with Loose Curls

Cornrows pull tightest at the front hairline and crown, so the tension you feel there is doing the work of holding the shape. The mistake most people make with a cornrow bun with loose curls is placing the bun too high, which leaves the loose curls at the nape looking like an afterthought instead of a counterweight. I learned this watching tutorials where the bun sat at the lower crown, right where the cornrows ended and the natural texture began. That placement lets the curls fall in a deliberate arc beneath the gathered braids.
The sources agree on the tools: a wide-tooth comb for detangling before you start, hair elastics to secure each cornrow end, and bobby pins to anchor the bun itself. Edge control gel smooths the front, though I would skip the mousse on the loose sections if you want the curls to keep their spring. When you coil the braids, leave the bottom third of each cornrow unwrapped so the transition into the curls stays soft rather than pinched. The bun should look slightly undone, per the guidance that a little mess adds texture. If the nape curls frizz by midday, the tension was probably pulled too far back during braiding rather than distributed forward into the cornrows themselves.
2. Mini Box Braids Top Knot
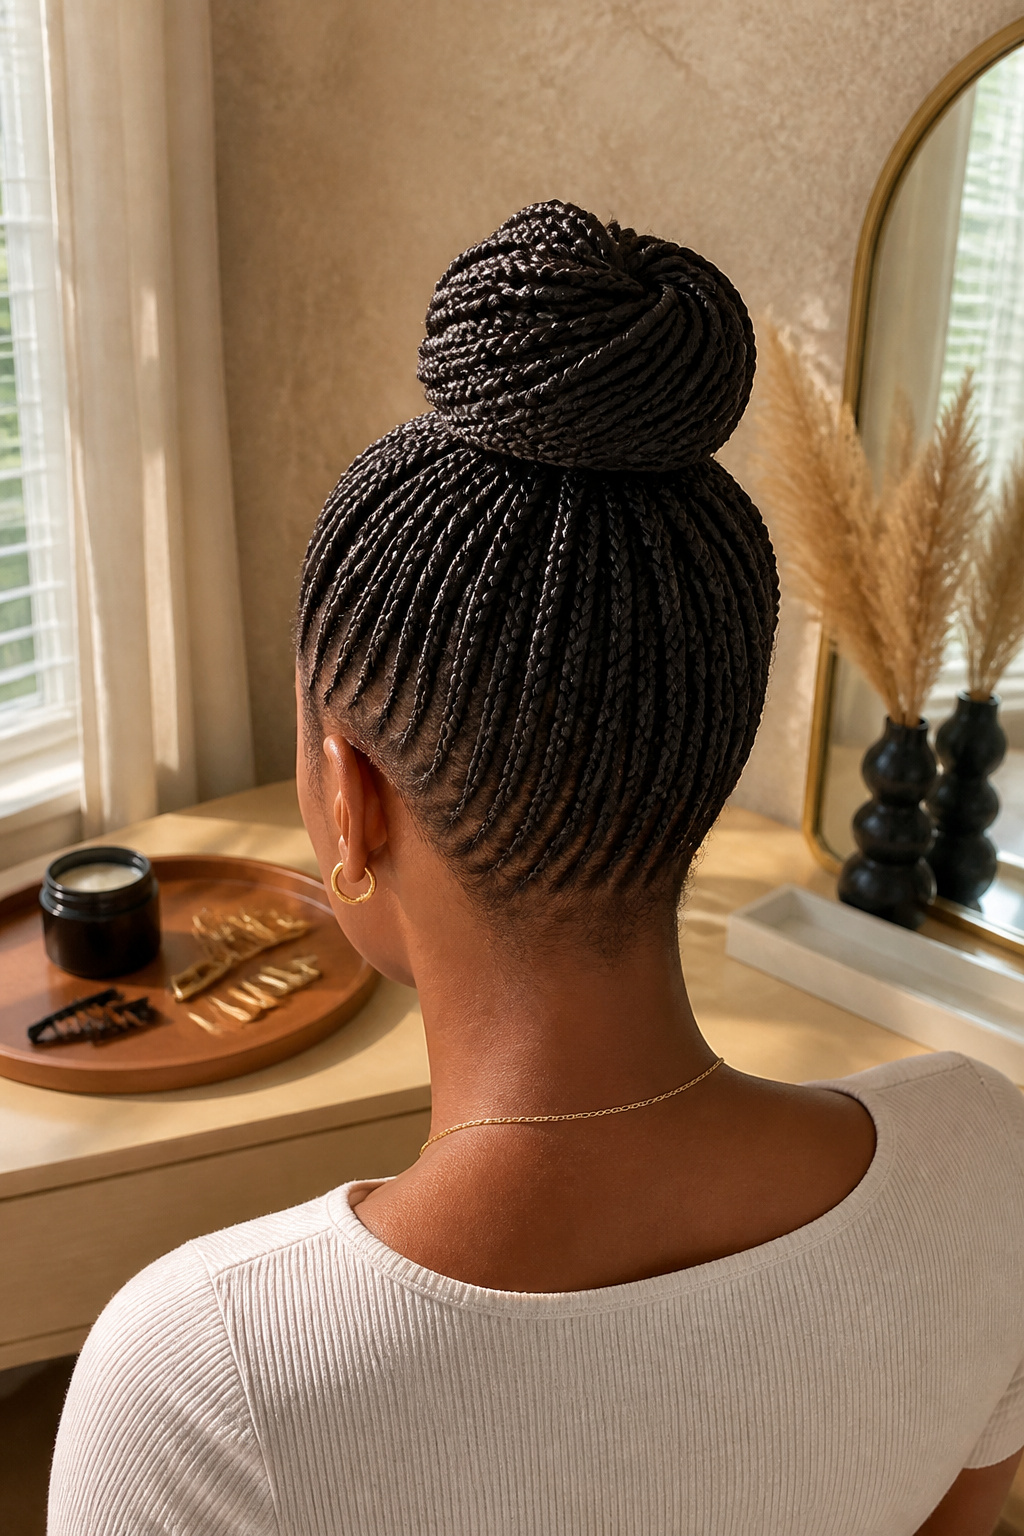
Mini box braids gathered into a high, compact knot sit differently than their larger counterparts. The scale of each braid relative to the finished bun changes the whole silhouette: dozens of fine plaits create a denser, more uniform surface, while thicker braids leave visible gaps and a looser profile.
The mini sizing also shifts how the knot behaves structurally. Smaller braids distribute weight more evenly across the scalp, which matters if you are piling them high. Hair extensions can add length and thickness for a fuller top knot, though the style works on natural-length minis too. The result reads as polished rather than casual, closer to the "higher the hair, the fancier" end of the spectrum.
For hold, hair wax helps smooth flyaways without stiffening the braids, and high clips or pins anchor the knot where you want it. The proportion play here is the point: the tiny braids against a tight, elevated bun create visual density that chunkier styles simply do not deliver.
3. Cornrow Braids with Back Details

The back of the head is where this style does its real talking. Cornrows are laid in curved or diagonal tracks that draw the eye toward a single gathering point, usually a low or mid-height bun, so the design reads cleanly when the wearer turns away. A mirror check from behind matters more than the front-view selfie here; the pattern should hold its shape without looking like random lines.
The spacing between rows is what separates intentional patterning from a quick tuck-and-go job. Wider gaps let each braid read as its own shape, while tighter spacing blends into a textured surface. Either works, but mixing the two within the same style usually looks accidental.
The bun itself needs enough bulk to anchor the visual weight of all that directional work. Too small, and the converging lines feel like they’re racing to nowhere. Most builds that hold up through a full day use the tail ends of the cornrows wrapped around a base rather than pinned flat, since pins work loose where multiple braids meet. The result should look deliberate from ten feet back, not just in close-up.
4. Knotless Braids Half-Updo
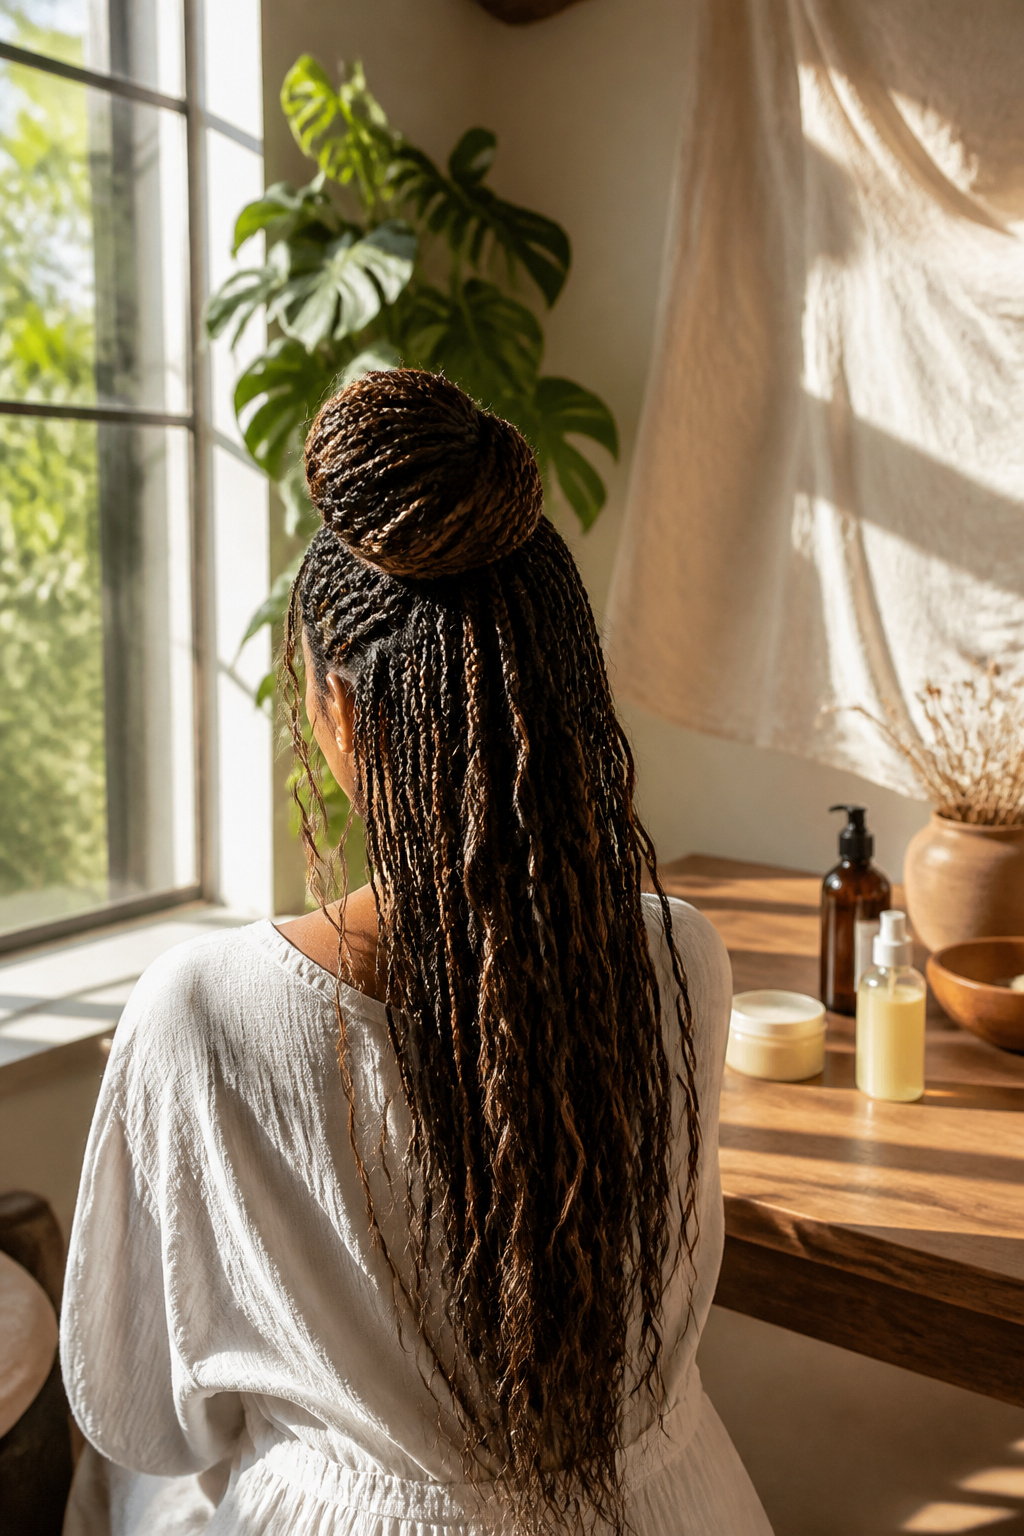
Knotless braids start with your own hair at the root, no knot to anchor the extension, and that changes everything about how the style wears for a full day. The tension spreads across the scalp instead of concentrating at one point, which matters especially at the crown where a tight knot can turn a half-updo into a headache by noon. For this style, the top section gets braided knotless from the hairline back to the crown, then gathered and wrapped into a small bun while the bottom half stays loose, in waves, or in its own separate braids.
The half-up shape works because the lighter tension lets you pull the upper braids snug without that pulling sensation that makes you loosen your ponytail an hour in. Your edges stay flatter too, since there is no bulky knot sitting right at the part line. What convinced me, reading through a dozen tutorials, is that the knotless method was described as the only way to wear a braided half-updo for more than a few hours without taking it down.
The lower half gives you options. Loose curls soften the look for an event; keeping the bottom in its own braids turns the style into something you can sleep on and wear again. The knotless top is what lets you sleep on it without waking to tension at the temples. Braiding density matters here: too many braids in the top section and the bun gets bulky and hard to pin; too few and the scalp shows through in a way that reads unfinished rather than intentional.
5. Curly Space Buns with Bangs
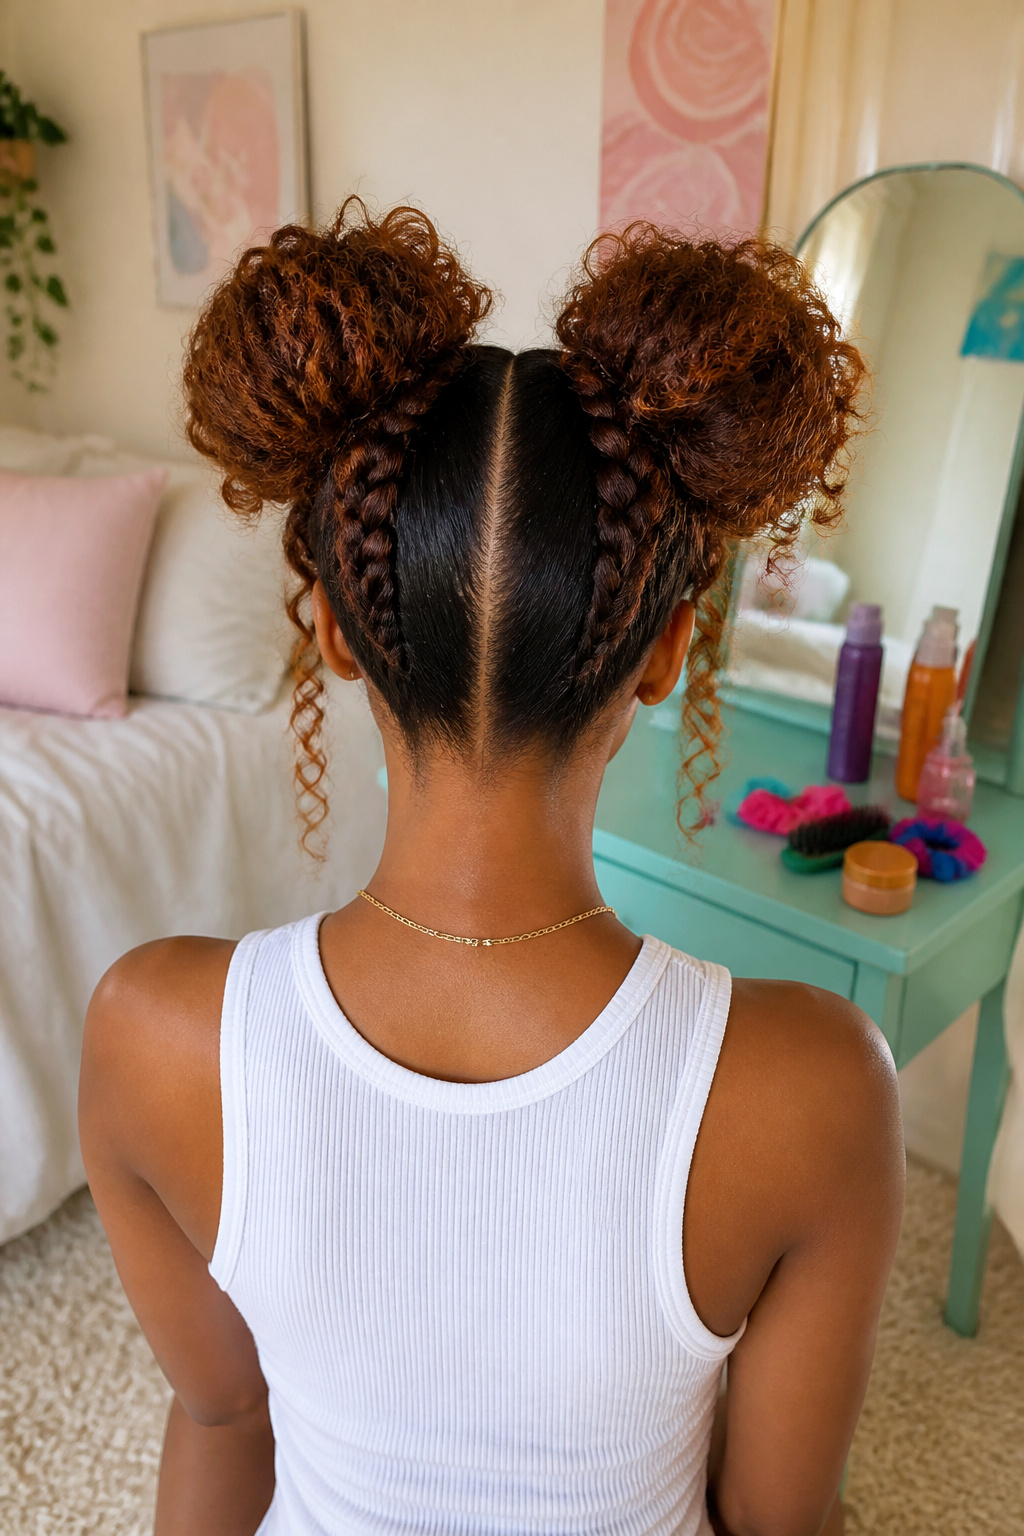
Curly space buns sit high on the head, one at each temple, and the symmetry matters more than you might think. Part the hair cleanly down the center first; even a half-inch drift to one side throws the whole look off once the buns go in. The curls need to be deliberate, not leftover texture from yesterday’s style. Work a curling product through damp sections, then diffuse or air-dry with the clips set at the root so the curl keeps its spring all the way up.
Bangs frame the face best when they carry the same curl pattern as the buns, not blown-out straight against all that texture. A small braid at each front corner, starting at the hairline and running back toward the bun, hides the part and gives the eye a path to follow. Keep those braids tight to the scalp and feed them directly into the base of each bun so nothing gaps or sags. The bun itself is a simple coil: wrap the remaining length around the root, pin through the coil, and let a few curls escape at the crown for height.
6. Flat Twist Updo
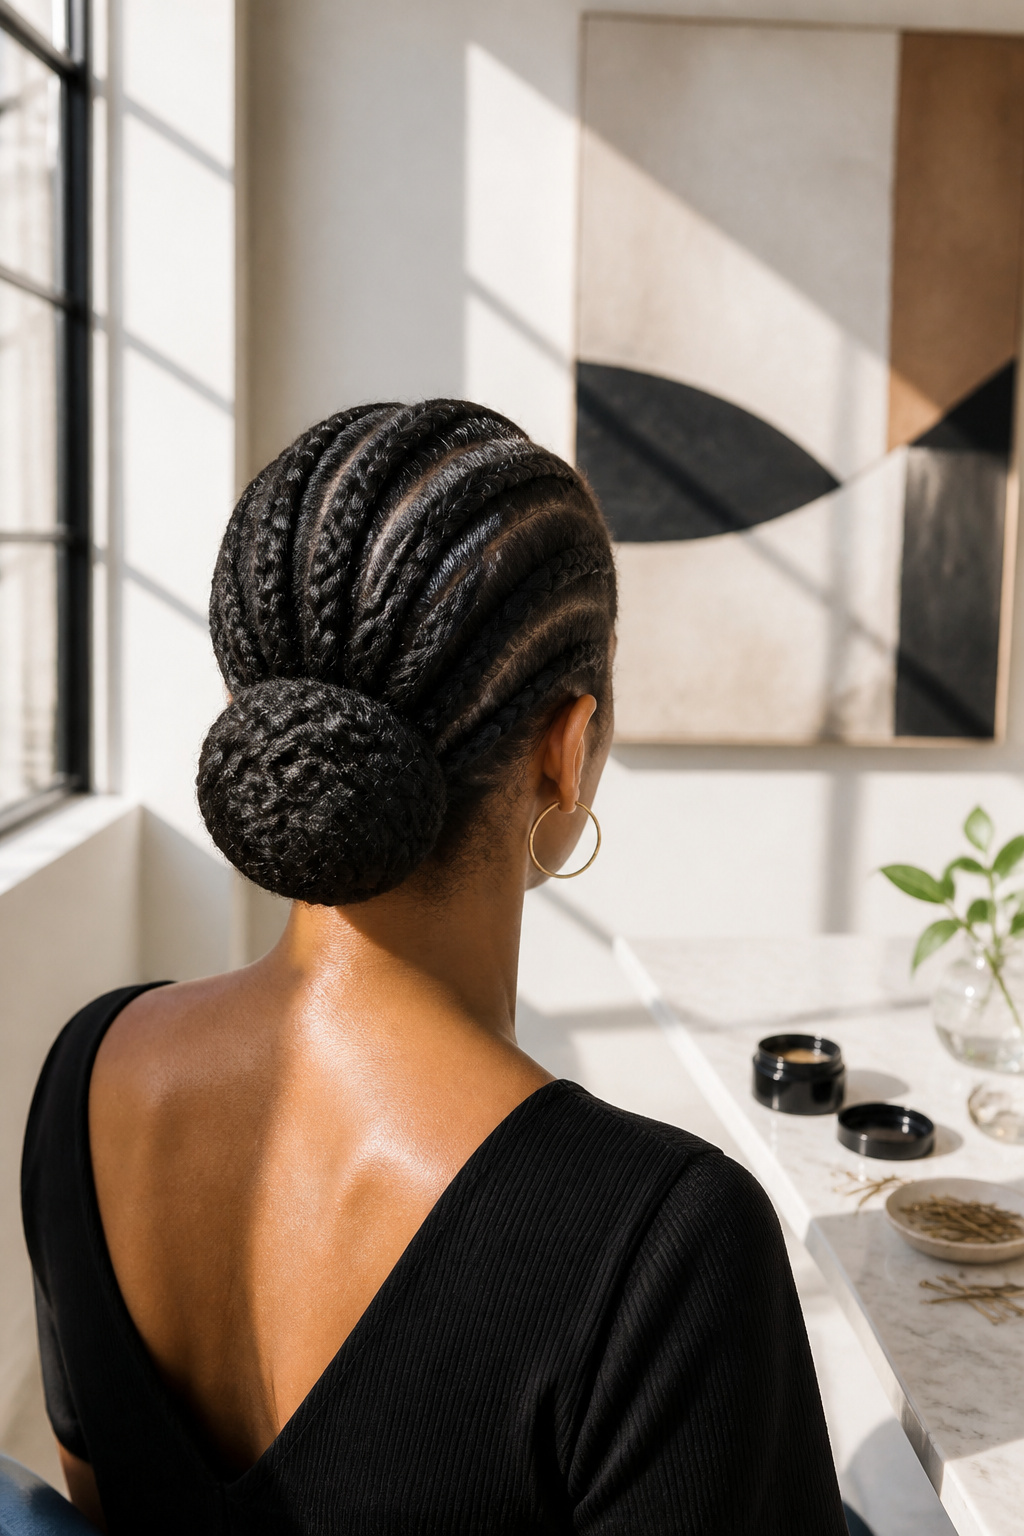
Flat twists sit almost flush against the scalp, two strands crossing over each other while you feed in small sections of loose hair with each pass. Cornrows do something different: three strands braid under or over themselves, creating a raised ridge that lifts off the head. That raised line changes everything once you sweep the hair upward. A cornrow bun has architecture, almost like a ribcage holding its shape. The flat twist bun spreads wider and lower, more like a fabric fold than a structure.
The flatter profile means less bulk at the crown, which some faces need. If your hair is fine or your scalp shows easily, flat twists give you coverage without the puff of raised braids. The trade is hold: cornrows grip themselves tight, but flat twists can loosen where the two-strand twist meets the bun. Securing them takes more pins, placed through the twist rather than across it, or the whole thing slides south by midday.
Your bun placement shifts too. With cornrows, a high bun looks balanced because the raised rows add height through the front. Flat twists push everything closer to the skull, so a mid-height or low bun keeps the silhouette from looking top-heavy. The twist pattern itself becomes part of the finished style, visible at the partings, so neat sections matter more than they do with cornrows that hide their lines in shadow.
7. Accessorized Box Braid Bun
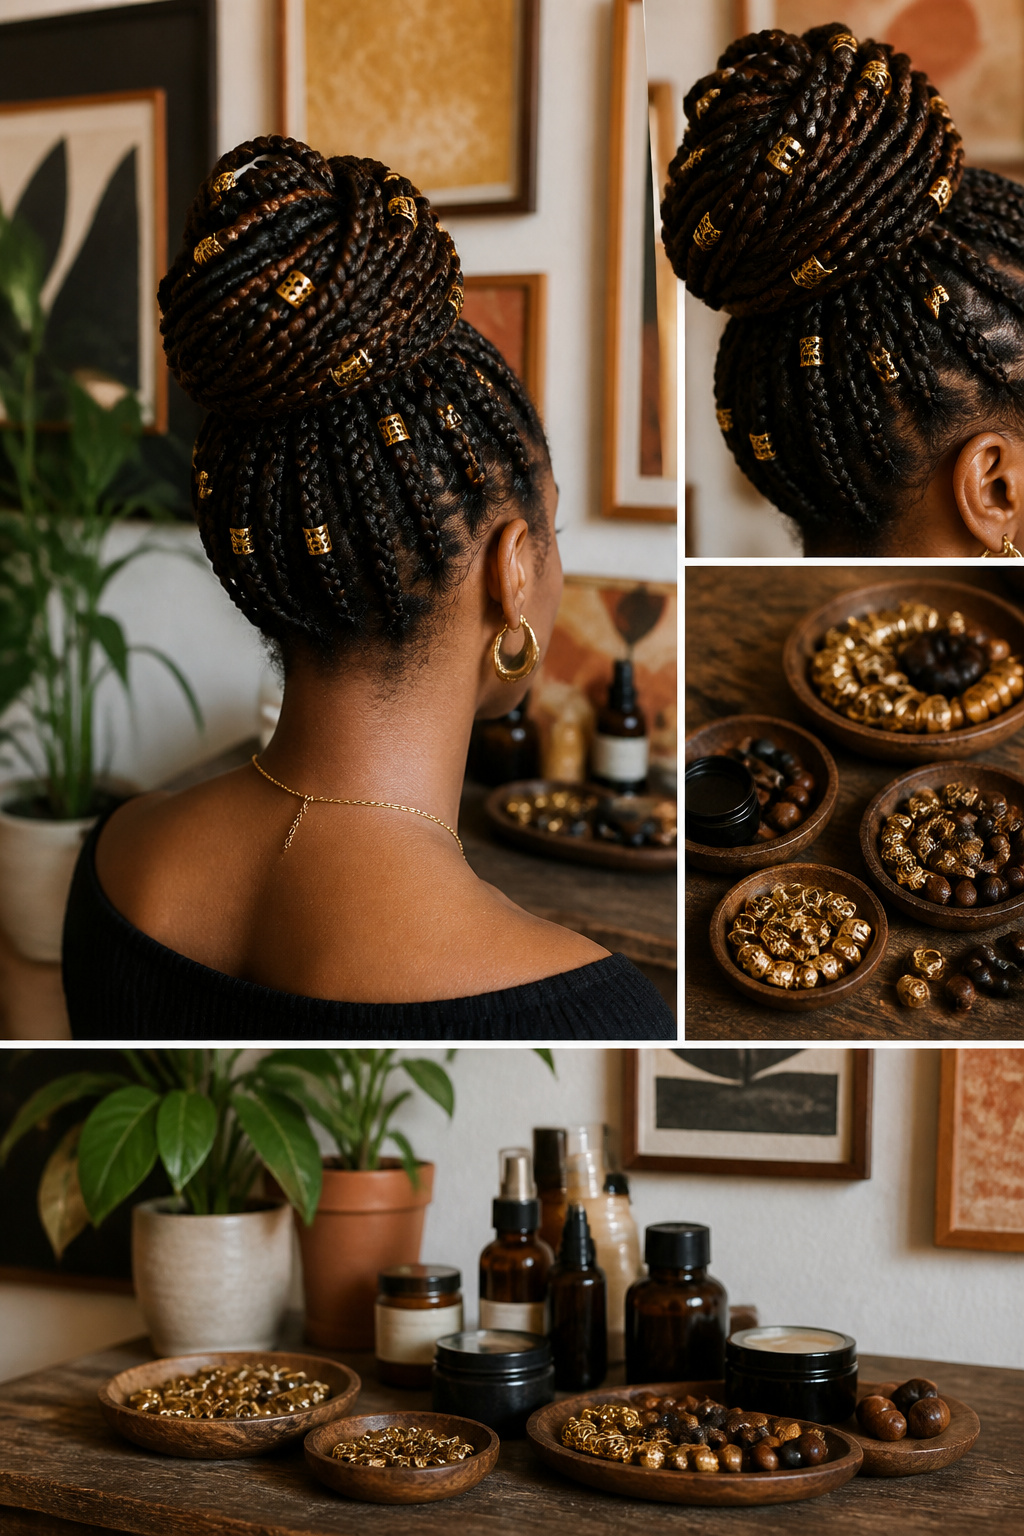
Gold cuffs threaded over the base braids of a box-braid bun catch light differently than beads do, and that difference matters for daily wear. Cuffs with a tight coil closure grip the braid without sliding; loose rings end up clustered at the nape by noon. Beads need securing with a small rubber band or thread wrap, or they clack against each other and fray the braid ends over weeks. Wire-wrapped accents look dramatic at the crown but the weight pulls fine braids loose by afternoon, so placement lower on the bun, where tension is shared across more braids, holds better through an eight-hour day.
The most reliable placement is a cluster of three to five cuffs right where the bun meets the scalp, not scattered through the twist itself. That spot takes less friction from collars and headrests, and the hardware stays visible from the front and profile angles. For beads, the ends of braids that stick out from a messy bun style work better than embedding them into a tight coil; they move with natural motion instead of getting buried. Skip glue-in jewels entirely. The residue builds up at the braid base and the whole accessory slides down the shaft within a couple of wears.
8. Stitch Braids into Low Bun

Stitch braids build their pattern from the parting, not from the braid itself. A thin horizontal part gets lifted and braided into the next row, leaving a clean line that reads like a seam across the scalp. The spacing between those horizontal stitches is what gives the style its structure; too wide and the sections look gappy, too narrow and the tension pulls at the roots by day three.
For a low bun at the nape, the stitch spacing should sit between a half-inch and three-quarters of an inch so the gathered bulk forms a smooth roll rather than a lumpy coil. Wider spacing leaves visible scalp through the bun, which breaks the clean line that makes this style look deliberate. The braids themselves need to run straight back or angle slightly downward; any upward curve fights the natural fall of hair into a nape-level gather.
The bun forms from the unbraided ends, usually two to four inches of loose hair depending on length. Those ends get wrapped counter to the braid direction so the horizontal stitches stay visible from the back rather than twisting under. A few pins placed through the bun’s base, not across the top, hold the weight without flattening the crown.
9. Upswept Micro Cornrows

Micro cornrows swept upward and gathered into a bun create a surface so densely textured it reads almost like fabric from a few feet away. The visual weight comes from the sheer number of braids: each one no thicker than a toothpick, packed close enough that the scalp disappears beneath them. That density is the point, but it costs time. A full head of micro cornrows this size can run four to six hours in the chair, sometimes longer if your hair is particularly thick or long.
The direction matters as much as the size. Braids pulled straight back flatten the crown; angling them upward from the hairline toward the bun’s center builds lift and keeps the style from looking pulled too tight against the skull. The bun itself sits high, usually at or above the occipital bone, so the upward sweep of the cornrows stays visible rather than disappearing into the knot.
Your edges need attention with this style. The tension is distributed across many small braids, but each one starts at the perimeter. A braider who grips too tightly at the front will stress those fragile hairs over hours of work. Ask for finger-width parting at the temples, slightly larger than the micro sections on top, to reduce pull where the hair is finest. The trade is worth it: slightly less density at the hairline preserves the style’s longevity and your edges.
10. Ombre Feed-Ins

Feed-in braids that shift from dark roots to honey blonde or burgundy ends gain a second life when coiled into a bun, because the placement decides whether that color story gets told or hidden. A high bun at the crown fans the ombre outward like a gradient halo; every wrap of the braid shows the transition from one shade to the next. Lower placements, at the nape or behind one ear, tuck the most saturated ends underneath and leave only the deeper root color visible from the front.
The technique matters more than the color itself. Braids fed in with the lightest pieces concentrated at the perimeter will flash that tone only where the bun exposes them. Reverse it, and the bright ends disappear into the center twist while the darker base frames your face. A medium-height bun with a slightly messy wrap catches the most angles of color without looking like you planned it; too tight, and the ombre reads as stripes, too loose, and the shift muddies into one tone. The feed-in method already hides where extensions start, so the color change looks like it grew from your scalp, which only works if the bun doesn’t shear off the ends that prove the illusion.
11. Afro Puff with Front Twists

Front twists pull the hair away from the face while the back stays loose and full, so the finished shape reads as a puff with structure rather than a braid-to-bun conversion. The front section gets two-strand twists or flat twists worked straight back toward the crown, where they meet the rest of the hair. From there, the volume is gathered and shaped upward or slightly back, secured with pins or a band, and left rounded and soft.
This hybrid approach sits apart from fully braided styles because the puff itself is not braided at all. The texture contrast matters: smooth, defined twists against the natural density of the puff. Someone with tighter coils will get more height and hold without much product, while looser textures may need to band or lightly backcomb the gathered section to keep the shape from collapsing by midday.
The style works best when the twists are firm but not tight at the root, since tension headaches show up fast if you pull the front too hard. A light edge gel on the twisted sections keeps them neat without the stiffness of heavier pomades. The puff can sit high, centered, or slightly off to one side depending on where the twists converge, and the whole thing takes less time than a full set of braids because only the perimeter is manipulated.
12. Artistic Braid Design Style

Geometric parting turns the scalp itself into a canvas before a single braid is laid. Cornrows can follow a starburst from the crown, a zigzag across the temple, or a heart shape worked into the top section. The pattern reads clearly while the hair is down, but the real shift happens at the junction where those planned lines gather into the bun’s base. A low placement at the nape keeps every angle of the design visible from behind; a higher bun folds the geometry inward and wastes the work. Colored braids sharpen the effect. Green strands against a darker base make each parting line pop like ink on paper. The bun itself stays simple, almost plain, because the design lives in the approach to it. What convinced me, looking through dozens of these styles, is that the restraint matters more than the complexity. A heart shape or a set of radiating lines does the job; piling on shapes fights for attention and loses the clarity that makes the style read as intentional rather than busy. The braid size should stay consistent through the patterned zone. Shifting from micro cornrows to chunky plaits mid-design breaks the visual logic and turns the bun into a patchwork instead of a composition.
13. Chunky Side Braided Do

Fewer, thicker braids swept to one side carry real weight, and that weight shifts the longer you wear the style. I learned this watching tutorials where the bun sits at the temple or tucked behind the ear, not centered, and the asymmetry means gravity pulls differently hour by hour. The side placement loosens faster than a centered bun because all the tension gathers on one stretch of scalp instead of distributing evenly.
Three to four braids, each the width of two fingers or more, give the chunky look without the bulk that strains the anchor pins. The sources suggest securing the first wrapped braid with a bobby pin matched to your hair color, then wrapping the remaining braids underneath so the ends hide. What they do not always mention: by afternoon, the lower braids slide against the upper ones, and the whole bun drops a half-inch toward the jawline. A second pin at the base, driven upward through the bun rather than across it, catches that shift before it starts.
Edge control or gel smooths the tension side where the braids pull tightest, which is also where flyaways show first. The asymmetry flatters heart-shaped partings and deeper skin tones with contrast color, but the real test is whether you can touch your face without the bun brushing your cheek. If it does, the wrap is too low or too loose, and the fix is not more pins but re-wrapping higher, closer to the temple, where skull curvature gives the pins something to bite.
14. Bohemian Braids Style

Loose, textured strands are what separate a bohemian braided bun from the polished styles you see in salon portfolios. The tension stays intentionally light from the first cross of hair over hair, letting wisps escape around the face and along the braid’s length rather than fighting to slick them down. That softness carries through to the bun itself, which sits lower and more relaxed on the crown or nape than a tight ballerina knot.
The bun secures with pins or a wrap that holds shape without anchoring to the scalp, which is where most people go wrong and end up with a headache by noon. Your fingers should be able to slip between the gathered hair and your head without resistance. A few face-framing pieces pulled free before you finish, or gently tugged out afterward, keep the whole look from reading as accidental rather than chosen. The result reads effortless, but the effort lives in stopping before you overwork it.
15. Cornrow Updo with Hair Cuffs
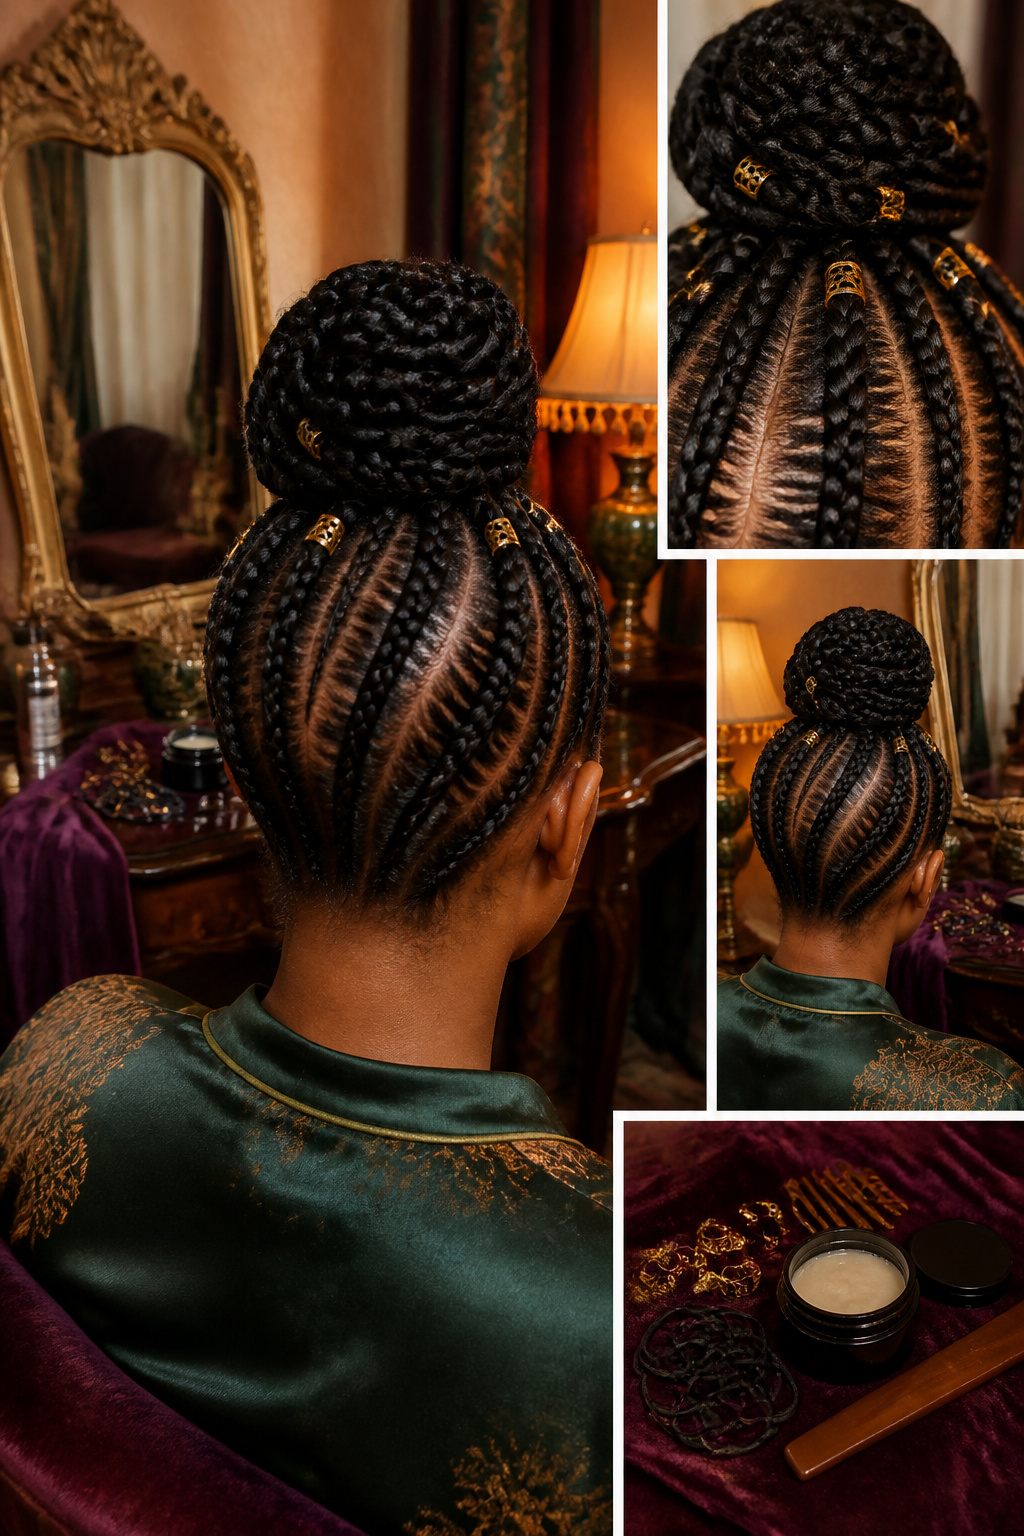
Cornrows pulled straight back and gathered into a bun give the style its structure, but the metal cuffs are what turn it into something you actually notice across a room. I like them slipped onto every third or fourth braid, spaced two to three inches down from where the cornrow meets the bun. Too many cuffs and the eye has nowhere to rest; too few and they read as an afterthought. Slide them on after the braids are finished and before the bun is pinned, since threading hardware through an already-set updo risks snagging the base.
The takedown matters as much as the install. Those same cuffs can catch on the braiding hair or your own strands when you are pulling them off at night. I open each cuff fully before sliding it upward and off the braid tip, rather than dragging it back down the length. A wide-tooth comb helps work out any tangles the metal leaves behind, and edge control gel touched onto the roots beforehand keeps the cornrows neat enough that the whole style survives a few days of wear.
16. Criss-Cross Stitch Braids Style

Stitch braids that cross in an X-pattern before joining the bun create a grid-like tension across the scalp that reads as architectural from the front and sculptural from behind. The criss-cross starts at the hairline with two strands from each braid section pulled across their neighbors, forming small X’s that repeat row by row until the crown. The crossing stops exactly where the head begins to curve toward its highest point, which is where the gathered braids fold into the bun itself. Below that line, the pattern holds; above it, the braids lose their anchor and need the bun’s structure to keep them from splaying. A neat finish depends on matching the tension of each X so the transition doesn’t bunch or gap where the flat work meets the rounded shape.
17. Two-Tone High Bun Style
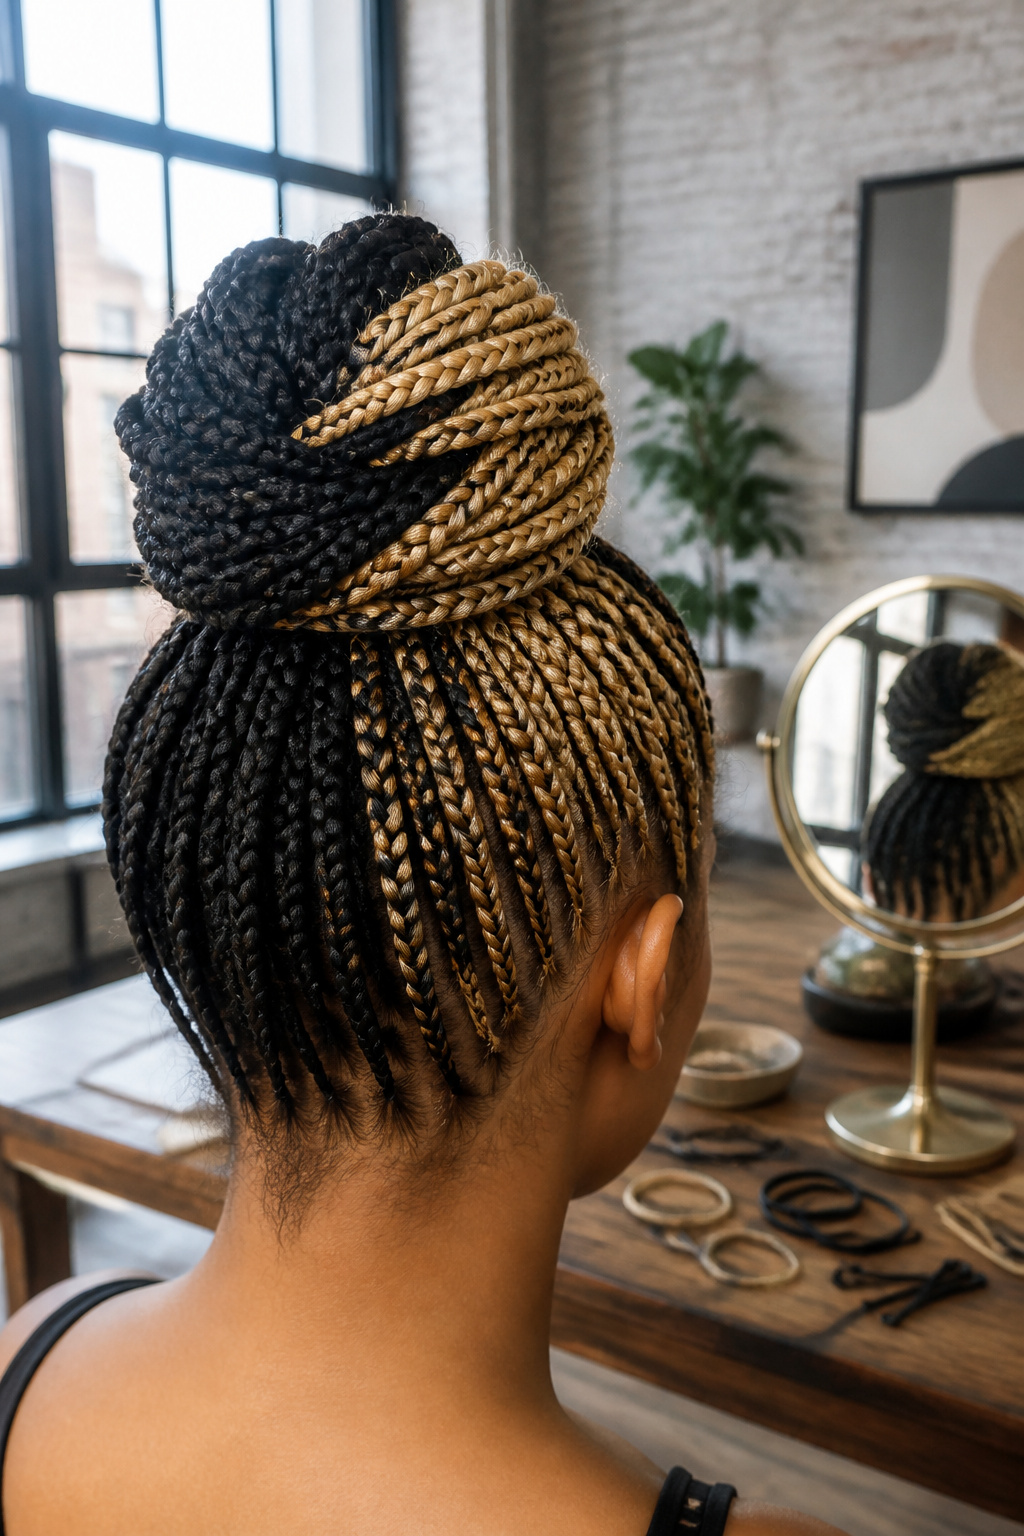
Two-tone braids wrapped into a high bun create the most dramatic color payoff when you plan the parting before you braid. The sources describe large box braids in two distinct shades brought together into one statement-making bun, and the way those tones interact depends almost entirely on where you place the part lines.
Horizontal parting across the crown lets the colors blend as the braids spiral upward, giving a marbled effect at the base of the bun. Vertical parting from forehead to nape keeps each color in its own territory, so the wrap shows clean blocks of tone that read as deliberate contrast rather than accidental mixing. I have seen both approaches work, but the vertical method demands more precision in wrap tension; loose sections collapse the color boundary into muddy territory.
The bun itself sits high enough that gravity becomes a factor. Heavy braids in two colors weigh more than they appear, so the anchor braids around the perimeter do the real structural work. Wrap them first, then coil the interior braids inside that frame. Color placement on those anchor braids matters: matching them to your root color creates continuity, while opposing them against your natural tone turns the bun into a floating shape that reads almost like an accessory.
Blavity’s framing of braided buns as adaptable holds here. The two-tone high version scales from a neat daytime coil to something larger and more sculptural for evening, with the color contrast doing the stylistic lifting so the actual construction stays simple.
18. Long Braids Updo

Waist-length braids have a way of turning a simple bun into a wrestling match with gravity. The first time I tried wrapping mine into an updo, the base turned into a dense, lopsided knot that sat like a stone at my crown. What changed the outcome was learning to spiral the braids flat against the scalp rather than stacking them vertically.
Start by securing your ponytail or gathered base low, not high. Take one braided section and wrap it horizontally around the base, pinning as you go. The second section wraps in the opposite direction, tucking underneath that first layer so the bulk distributes outward, not upward. If your braids extend past the back of your head, pin the ends where they land rather than forcing another loop.
Hair spray and bobby pins that match your color finish the hold. The flat-wrapping technique keeps the silhouette lower and more wearable, and the crossing directions keep everything from slipping by evening.
19. Embellished Hairdo with Braids

A braided bun becomes something else entirely when the decoration is woven in while the hair is being braided rather than pinned on top afterward. Thread, thin cord, or narrow fabric strips can be worked into the plait itself, traveling with the section all the way to the crown and disappearing into the bun’s center. Shells with small holes drilled through them slide onto individual braids and sit at intervals, or cluster where the braids converge. The difference matters because integrated elements stay put without tension on any single point, while a clip or cuff concentrates weight and risks slipping or stressing the hair beneath it. Fabric strips need to be torn or cut on the bias so they do not fray into fuzz; synthetic ribbons melt against a hot tool and should be added only after any heat work is finished. The effect reads as more intentional than accessorizing after the fact, and it survives a full day better because nothing hangs off the surface waiting to catch on a coat collar or seat back.
20. Medium Cornrows with Styled Edges

Medium cornrows with styled edges work best when the braids sit in standard width, neither micro-fine nor jumbo, so the scalp design stays readable without overwhelming the face. The bun behind acts as a quiet backdrop; a low placement at the nape keeps the frame intact, while a high bun risks pulling visual weight upward and competing with the edge work.
Edge technique breaks two ways. A soft swoop with edge control gel gives a polished finish that holds for office hours and evening both, and the gel’s hold keeps flyaways flat without the shellacked look. For more staying power through humidity, a small elastic at the braid base plus mousse through the cornrow body adds texture that grips the scalp pattern longer. Either approach needs checking against bun scale: a three-tier bun, with its height and drama, shrinks the edge frame to an afterthought, while a single neat bun at the neck leaves the edges as the style’s focal point. The tiered option suits days when the bun itself carries the look; standard edges, no elaborate design, keep the balance from tipping busy.
21. Tribal Twists into Bun

Flat twists that travel in opposing directions before gathering into a bun carry a geometry that reads as intentional from every angle. Each section is parted clean and twisted flat to the scalp, ending at the crown or nape where the lengths coil into a twisted bun. The pattern matters: alternating the direction of each twist creates a radiating effect that looks complex but builds simply once the parting is mapped.
The style borrows its sectioning logic from traditional African and African-American braiding, where scalp-visible patterns signified skill and cultural identity. Worn today, the reference sits quietly in the geometry rather than announcing itself. The flat twist itself is less bulky than a three-strand braid, so the finished bun stays neat and close to the head.
What convinced me, looking through dozens of these styles, is that the parting does the heavy lifting. Spend the time mapping symmetrical sections before twisting, and the bun practically forms itself. Rush the parting, and the asymmetry shows. For daily wear, smaller sections hold longer but take more time; larger ones give a softer, quicker result that may need pinning by afternoon.
22. Freestyle Braids with Color Accent

Freestyle braids with color accent live or die by how deliberately you place the chaos. The first time I mapped this out, I assumed random meant truly random, and the bun collapsed into a lopsided weight I couldn’t pin. What works is varying braid thickness and direction with intent: a pencil-thin rope pulled from the temple, a thumb-width section crossing backward from the crown, another dropping low behind the ear. Each angle creates a different tension point when wrapped.
The color strands do the framing. Bold pieces woven into the braids that form the outer shell become visible once the bun coils, catching light at the perimeter. Tuck those same colors into interior braids and they disappear entirely. Placement determines whether the accent reads as a halo effect or a hidden surprise that only shows when the head turns.
The organic shape comes from alternating tension. Tight braids near the scalp anchor the structure; looser ones at the ends create the soft, irregular silhouette. Wrap clockwise or counterclockwise based on which direction your sections naturally fall; fighting the braid’s own curve costs you pins and hours of hold.
23. Straight-Up Stitch Braids

Straight stitch braids demand the steadiest hand of any braided bun style because every part line is visible from the front. The braids run directly back from the hairline to a high crown bun with no curves to hide a wobble, which means the center line must be dead straight or the whole face looks off-center. A mirror held behind you helps, but the real check is turning your head slowly in a hand mirror to catch any drift before the braids are set.
The severity of those straight lines changes how the style frames your face. Without the softening effect of curved or swept-back braids, cheekbones and jawlines read sharper. If your face is already angular, you might want the braids spaced slightly wider at the temples to add width there. Rounder faces can handle the lines pulled tighter and closer together, since the vertical emphasis balances fullness.
The bun itself sits high enough that the braids function almost like a pulled-back headband, keeping every hair off the face for the full day. That precision is the point, but it is also the pressure: one crooked row and you feel it every time you catch your reflection.
24. Small Braids into High Bun
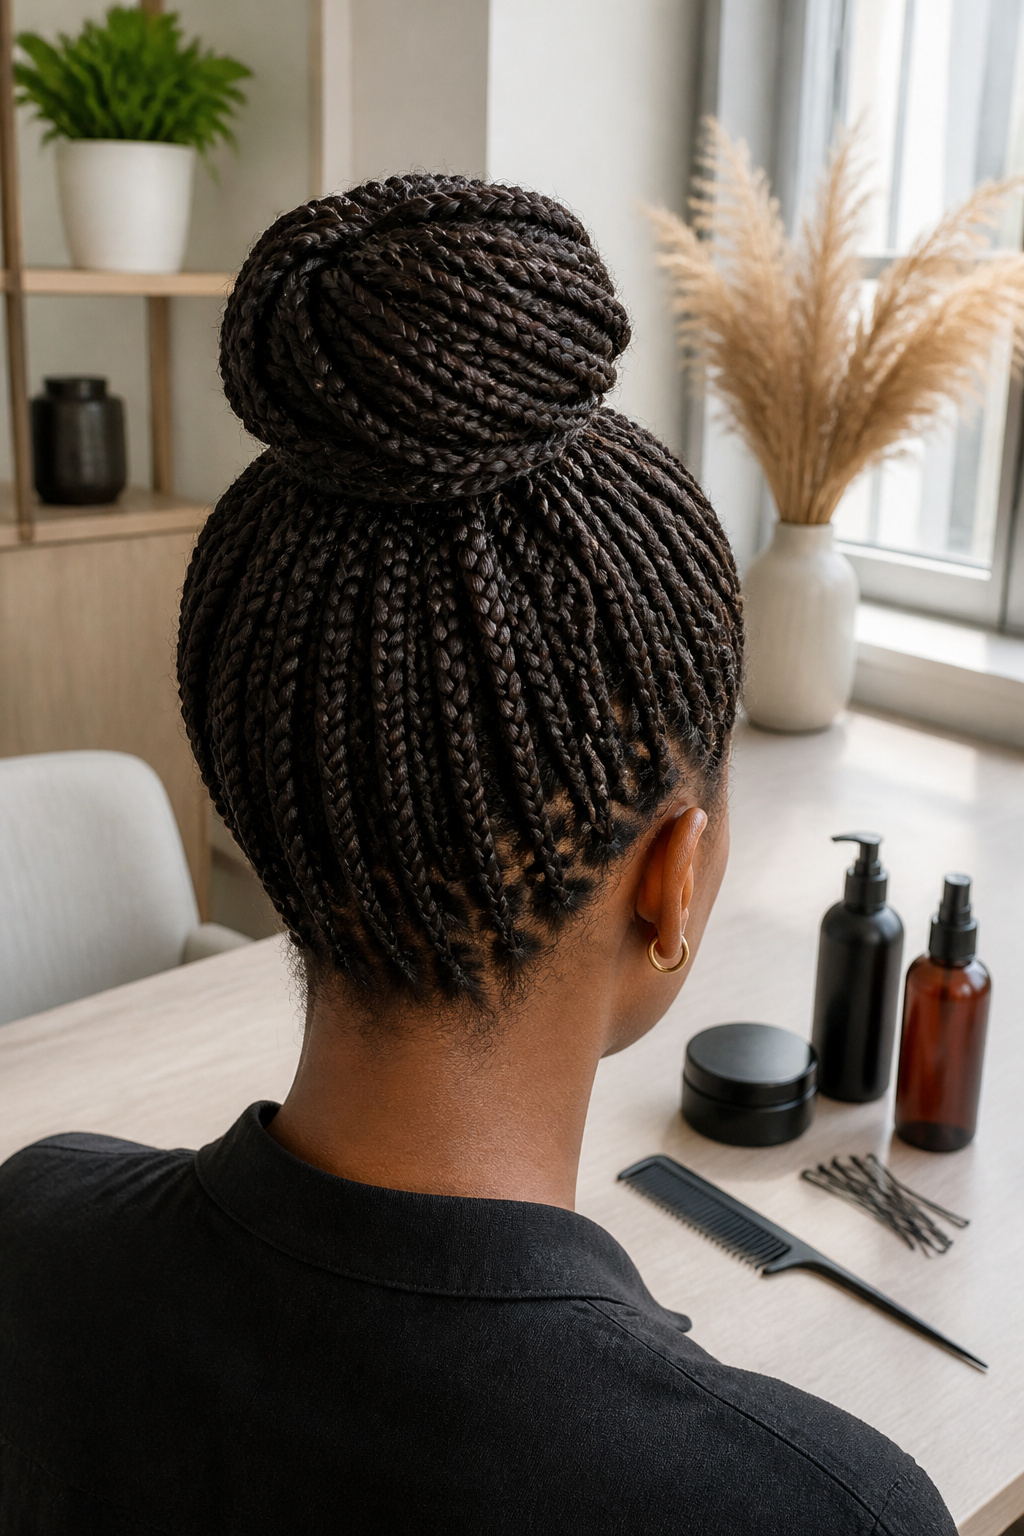
Fine braids, smaller than a standard three-strand but not quite micro, build a high bun that sits right at the crown rather than drifting toward the topknot zone. The weight collects there, and after a few hours that concentration can pull. What convinced me, reading through the tutorials, is that distribution matters more than tension. Part the hair so the braids radiate from multiple points across the scalp, not one central ponytail anchor. That spreads the load. A rat-tail comb helps place those sections precisely. Once braided, gather them high and coil. The smaller the individual braids, the more surface texture the bun holds without pins working too hard. Bobby pins still do the final work, tucked where the braids cross. For edges, a light gel application finishes the line without adding stiffness that competes with the bun’s shape. The crown placement only stays comfortable if the braids underneath are distributed like spokes, not stacked.
25. Double Low Buns

Two low buns at the nape live or die by the parting. A single center part from forehead to crown, then splitting that line straight down to the hairline, gives you two mirrored panels that each carry their own braid into their own bun. Skip the precision here and you end up with one lopsided mass that happens to have a dent in it.
I watched this distinction matter most on finer hair, where there is no volume to hide a sloppy divide. The rat-tail comb is the tool that makes the peace-sign geometry the sources describe: one vertical stroke from forehead to nape, then a horizontal part at the crown to separate front from back, so each braided section feeds cleanly into its respective bun without stray hairs crossing the midline.
Each side gets braided independently, Dutch or three-strand depending on the texture you’re working with, then coiled and pinned at the nape with deliberate space between them. The gap is the style; it should look intentional, not like a single bun that fell apart. Edge control finishes the look, but the structural decision, the one that saves you from starting over, is that first straight part down the center.
26. Braided Three-Tier Bun

A braided three-tier bun builds height by treating each section as its own miniature updo rather than one mass gathered at the crown. The lowest tier starts with a simple braid wrapped and pinned at the nape; this base must sit flat and tight, because every layer above will shift if the foundation slips. The middle tier gathers hair from the temples and upper ears into a second braid, coiled just above the first and secured with pins that cross through the previous bun’s center so the two sections lock together. The top tier, pulled from the crown and front, forms the final braid and smallest coil, pinned last and often slightly forward to create the silhouette’s peak.
Each tier needs its own set of pins or small elastics; relying on one fastener for the whole stack means the weight pulls everything downward by midday. The gaps between tiers should stay visible, not blurred into a single mound, so leave roughly half an inch of unbraided hair between where one coil ends and the next begins. Fine hair sometimes needs texturizing spray at the roots before braiding, or the top tier collapses into the middle one. On thicker hair, the opposite problem: the tiers can mushroom outward, so keeping tension even while braiding matters more than making each section tight against the scalp.
27. Two Bright Curly Buns

Bright color on curly hair already asks more of your routine than natural tones do, and splitting that hair into two buns adds tension points most people do not think to check. The elastic bands sit right where the color processes heaviest, usually the midlengths, and the pull there opens the cuticle enough to let pigment slip out faster. Check your bands every third wash for dye transfer; seeing tint on the elastic means the tension is too tight or the section needs a protein mask before the next style.
Two buns also expose more surface area to sun and friction than one, so the crown fades unevenly if you skip a UV protectant on the part lines. I part mine slightly off-center and rotate which side sits higher each week so neither section takes the same stress twice. The curl pattern holds better in buns made on stretched, not freshly washed, hair; wet braiding tightens as it dries and the color-treated strands snap where the elastic grips. If your curls loosen at the bun base after day two, a small satin scarf wrapped around the bands at night protects the shape without adding another product layer that could oxidize the dye.
28. Multi-Style Feed-In Braids

Feed-in braids that merge two techniques into one bun ask more of the transition point than most styles do. Cornrows braided toward the crown can dissolve into box-braid sections at the nape, or the reverse, but the shift has to happen where the gathered weight still pulls evenly. A lopsided transition shows once the bun is pinned, because the tension is no longer distributed around a circle.
The sources describe this as a matter of braid size and style: multiple smaller braids woven together create a more intricate updo, while a single large braid twisted into a bun reads simpler. Combining the two means deciding which technique carries the visual weight. Cornrows laid close to the scalp keep the perimeter neat, and box braids rising from them add volume where the bun forms. Reversing that order, the box braids sit at the hairline and cornrows feed into them toward the back, but the bun then lacks the anchor density at its base.
What convinced me, reading through the descriptions, is that the unified structure depends on where the feeding stops and the wrapping begins. End the feed-ins too low, and the bun sits on a bulky ridge. Carry them too high, and the pin points slip. The sweet spot, if there is one, is where the last added extension meets the natural hair at a point that can be gripped whole.
29. Colored Bun with Heart Design

Green box braids with a heart-shaped parting at the crown pull the eye upward, and the shape stays readable once the braids gather into a large bun because the pattern is set at the root, not the ends. The color helps: against a darker base, the heart line reads as a deliberate graphic rather than a trick of parting. Height matters too. A lower bun would fold the crown flat and lose the design; building the bun high keeps the heart visible from the front and the side.
Loose curls at the nape, like the ones paired with feed-in cornrows in some variations, soften the look if the color feels too loud. The contrast between the structured crown and the free texture underneath keeps the style from reading costume. A heart parting survives best when the braids feeding into the bun are grouped to follow the curve, so the shape isn’t stretched or hidden by the wrap. Fans of colored styles should give this a try, but the commitment is real: the parting has to be set before braiding begins, and any slippage during the bun build shows immediately.
30. Fulani Braids Half Bun

Fulani braids carry a front-to-back rhythm that reads immediately, even in a partial style. The traditional pattern runs a single center braid forward toward the face while the rest sweep back, often with raised rows at the temples and small braids or beads framing the hairline. For a half bun, you keep that architecture on top and gather it into a bun at the crown, leaving the lower braids to hang free down the back.
What convinced me, reading through a dozen of these adaptations, is that the style only works if the parting stays precise. The top section needs clean horizontal division from the lower, or the bun looks accidental rather than intentional. Most versions I saw kept the bun medium and slightly back, not piled high, so the forward braids still do their framing work.
The lower braids left down are typically finished with beads or metal cuffs near the ends, a direct pull from Fulani styling. Without that detail the look drifts into generic half-up territory. Keep the front-to-back braiding pattern visible above the ear on both sides, even if you tuck some lengths into the bun for volume. Lose that directional line and you’ve lost what makes the style specific.
What You Need to Start

A wide-tooth comb, hair elastics, and bobby pins form the backbone of nearly every braided bun style. The comb matters more than people expect; it removes tangles without snapping the hair, which keeps braids smooth from the start. Two kinds of elastics are worth keeping around: standard ones for securing the final bun and mini elastics for locking off braids before you pin them up.
Edge control gel sits in the optional column for some styles and essential for others. It polishes the hairline and keeps flyaways flat, especially if you are working with finer textures or wearing the bun pulled tight. Hair mousse is the most optional item on this list; it adds texture and hold, but only grab it if your hair tends to slip out of braids or you want extra grip before you start. I skip mousse on second-day hair since the natural oils already do half the work.
How Braided Bun Variations Work

The same braided bun shifts registers through a handful of decisions anyone can learn to read. Tension is the first: pulling the braids snug against the scalp reads as polished and event-ready, while a softer gather with visible gaps between sections drops the style into weekend territory. The number of braids matters too. A single thick rope twisted into a bun carries formality; scattering several smaller braids across the crown before gathering them loosens the whole effect.
Placement finishes the job. A high crown bun draws the eye upward and pairs naturally with cleaner edges, which reads dressier. Sitting the bun at the nape, or splitting it into two low knots, moves the same technique toward casual or protective-styling territory where comfort and longevity matter more than silhouette. The passages note cornrows and box braids as base options, and that choice alone changes the outcome: cornrows lie flat and disappear into the bun, while box braids add bulk and texture that stand out even from a distance.
They are delicate and romantic, completely detailed and formal, and sweet and casual all at the same time… Each style can either be incredibly simplistic and polished, or delicate and exquisitely ornate.
— Bustle
What that means in practice: the difference between brunch and black-tie is rarely the technique, it’s the tension and the finish. A mist of shine spray and a few pins tucked flush against the scalp can push the same base style across the whole range.
Building the Bun Step by Step

- Detangle first with a wide-tooth comb or your fingers so the braid tension stays even from root to tip. Textured or coily hair benefits from extra moisture here; soft hair braids cleaner and holds longer without pulling at the scalp.
- Section with a rat-tail comb for precision. A single braid gives a sleeker bun; multiple smaller braids build fullness. The part placement decides where the bun sits, so mark your crown, nape, or side before you start braiding.
- Braid each section. Three-strand is the baseline, though cornrows, Dutch braids, or box braids change the surface texture of the finished bun. Secure each braid with a hair elastic so nothing unravels while you work the rest.
- Gather the braids at your chosen position, then twist or coil them into a bun shape. Criss-crossing the braids first adds structure for more intricate styles. Adjust how much hair you wrap to control the final size.
- Anchor with bobby pins, tucking loose ends inside. Edge control or gel smooths flyaways for a polished finish, and a light mist of setting spray locks everything against frizz through the day.
Cultural Roots and Present-Day Wear

Braided bun hairstyles carry a lineage that runs far deeper than their current Pinterest boards. Within the Black community, braiding has long functioned as both protective care and cultural record, with techniques passed between generations and adapted as hair needs and daily life shifted. The braided bun sits at a practical intersection of this history: it gathers the protective work of box braids, cornrows, or twists into a style that stays neat through work shifts, workouts, and sleep.
What strikes me, looking at how these styles circulate now, is the tension between appreciation and extraction. The same fashion outlets that now feature braided buns on non-Black models often stripped that context a decade ago. The versatility Blavity notes, that makes braids "cherished and versatile," gets treated as a trend discovery rather than a sustained practice. Meanwhile, the women who actually built the style’s vocabulary, the ones who know which braid density holds a bun securely for a 12-hour nursing shift versus which slips by hour three, rarely get the byline.
The thirty style variations Right Hairstyles catalogs, from feed-in cornrow bases to twist constructions, mostly reflect this practical creativity. A bun built from knotless braids distributes tension differently at the scalp than one from traditional box braids, a distinction that matters if you’re wearing the style for weeks. The current fashion moment has at least widened access to these specifics, even if it still fumbles the attribution.
Braided Buns for Different Hair Textures

Coily hair holds a braided bun beautifully once the moisture balance is right. The pattern that worked for me, reading through dozens of tutorials, was layering products in a specific order rather than piling them on at once.
Start on damp, not soaking, hair. A leave-in conditioner goes on first, right out of the shower, to seal in the water already there. Work it through with fingers or a wide-tooth comb before any braiding begins. Once the hair is about seventy percent dry, a light styling cream or edge control adds the grip needed for clean parting and tight braids without flaking.
The critical timing is that second layer: too early and it mixes with water and slides off; too late and the hair has already started to frizz against itself. Apply edge control or gel after braiding but before forming the bun, smoothing flyaways and defining the perimeter while the hold is still pliable. A light mist of setting spray locks everything in place without the stiffness of heavy hairspray.
For the bun itself, cornrows or box braids gathered at the crown or nape give the most secure foundation. Twist or coil the braids around each other, pin with bobby pins tucked into the base, and the style stays polished through a full day.
Frequently Asked Questions
What is a braided bun?
A braided bun means creating one or more braids and wrapping them into a bun shape. The style ranges from a single large braid twisted into a bun to multiple smaller braids woven together for a more intricate updo. You can build it with cornrows, box braids, or other braiding techniques depending on the look you want.
How do I make a braided bun?
Start by braiding your hair, then wrap the braid or braids into a bun and secure with bobby pins. The bulkiest part of the braid should form the majority of what shows in the finished bun. Pull the braided pieces apart slightly to add texture; a little mess looks intentional rather than sloppy.
What materials do I need for a braided bun?
You need a wide-tooth comb for detangling, hair elastics to secure braids and the final bun, and bobby pins to anchor everything in place. Edge control gel keeps the front smooth, and hair mousse adds texture and hold if you want it.