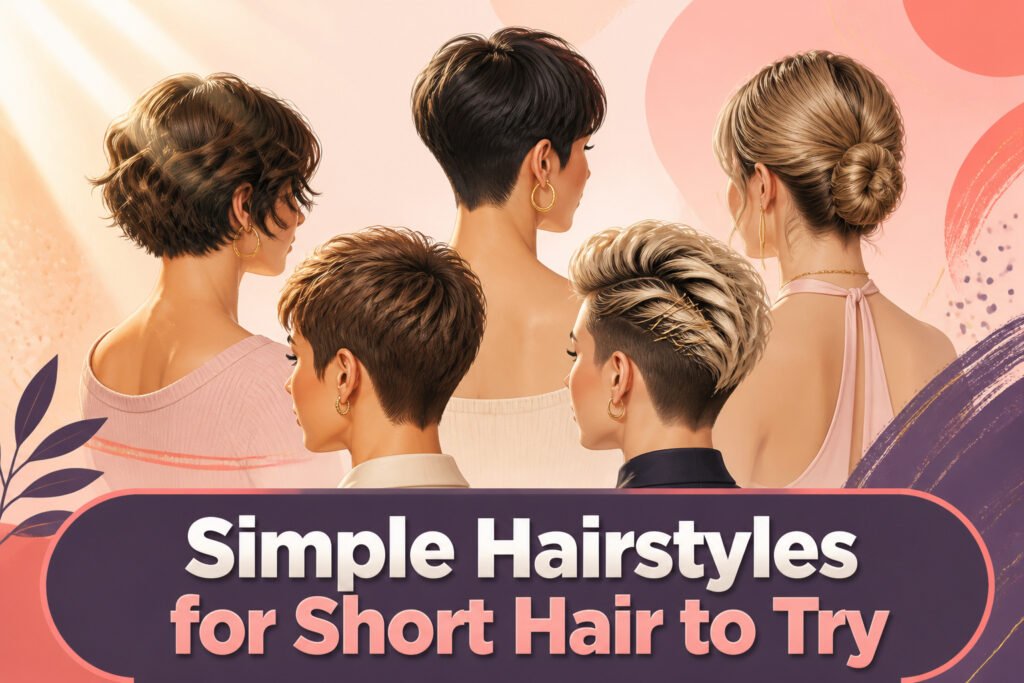
Short hair styling runs from a sixty-second side twist to a loop-and-knot updo that eats twenty minutes but photographs clean from behind. The deciding factor is the event, not the length: a dinner with your coat on demands something different than a wedding where someone shoots video over your shoulder. Even a pixie growing out through its shaggy mullet phase has an entry here, the elegant mohawk using four inches on top with the sides pinned flat.
1. Topsy Tails Updo

A half up half down style lands right where short hair needs it: off the face without giving up the length you still have. The topsy tail flip is what turns the basic shape into something that reads dressed-up, and on shorter cuts it takes maybe two minutes once your hands know the motion.
The mechanics stay simple. Gather the top half from just above the ears, secure with a small elastic, then flip the ponytail through itself toward the crown so the twist sits visible. A second topsy tail an inch or two below the first adds the detail that makes people ask where you had it done. Bob-length hair handles this cleanly; much shorter and you run out of tail to flip, much longer and you’re in ponytail territory anyway.
What sells the dressed-up effect is the slight lift at the crown. Tease with your fingers or a tail comb before you flip, then mist with a workable hairspray so the height survives the day. The texture matters too: keep a soft wave through the lengths rather than pulling everything straight. One face-framing piece left loose keeps the look modern rather than matronly.
The whole thing survives without heat if your hair has natural bend. On straighter textures, a quick pass with a flat iron to add bends before you section makes the finished shape hold longer.
2. French Twist for Short Hair

The classic French twist assumes enough length to fold and tuck, which makes short hair feel like a non-starter. A small elastic at the very end of your gathered section changes that. It gives the twist something to grip so short layers don’t slip free mid-roll.
Bring everything to one side and keep it sleek. Tease what remains, pull it to the back, and secure the elastic at the ends. Twist upward and hide the elastic inside the fold, not below it. Two bobby pins finish the job: one driven in at the top of the twist, another at the bottom. The elastic disappears into the roll itself, and the pins sit opposite to the twist’s direction so they don’t work their way out.
For very short cuts, exposed pins can read as intentional. Jennifer Lawrence wore hers that way at a Dior show in Paris, letting the pins secure uneven grow-out strands rather than fighting them. Conair bobby pins run about $2 if you’re stocking up; the trick is having enough on hand that you’re not reusing the same stretched pair.
3. Easy Side Twists

Two small twists pulled back from each temple frame the face without looking fussy, and the whole style takes about sixty seconds once your hair is already smooth. The professional finish comes from keeping the surface sleek, not from perfect technique. Twist a section from one temple toward the back of your head, secure it with a bobby pin inserted opposite to the twist’s direction so the tension holds, then repeat on the other side. The pins stay hidden and the twists stay put through a full workday because that counter-direction placement grips against the pull. I have watched enough tutorials where the pin goes in the same way as the twist and slips out by lunch. This method needs only two pins total, which keeps the look minimal rather than crowded with hardware. It works best on hair that has some product or natural oil for grip; freshly washed hair may need a light mist of texturizing spray first.
4. Half Up Half Down Bun with Tiny Braids

Two micro braids above each ear are what turn a basic half-up bun into something that looks deliberate. Part a slim section at each temple, braid it back toward the crown, and secure both with clear elastics before you gather the top half. The braids sit almost hidden until you turn your head, then they frame the bun like a narrow headband.
Short ends that stick out of a small bun read as sloppy, not messy. Tuck them inside with crossed bobby pins before you pull the loop tight, or the whole shape collapses by noon. A ponytail pulled only halfway through its elastic, then pinned into a loop, keeps the bun low and flat enough that even chin-length layers stay put. I tried doing a full wrap first and spent the morning re-tucking; the half-loop method wins for hair that barely clears the jaw.
5. Party Hairstyle for Short Hair

A loop-and-knot updo builds volume on a bob or pixie by hiding the mechanics inside the twists themselves. Start with a half-up, half-down base. Take one side strand, slide a bobby pin through near the end, then twist it across and anchor at the opposite side of the partial ponytail. Mirror the move on the other side, then secure the new gathered section with a small elastic to add a second anchor point. Repeat this loop-and-pin sequence down the remaining length, letting each new twist cover the last, until the ends tuck under. The pins disappear because the next strand wraps over them, not because you buried them deeper.
Decorative hair jewelry at the final twist distracts from any texture that refuses to cooperate, which matters when humidity or a grown-out cut stage fight back.
The technique eats more minutes than a basic twist-and-pin bun, so the payoff has to be worth it. A holiday party, a wedding guest slot, any event where someone might photograph you from behind, that is when the extra layering earns its place. For a dinner where you will keep a coat on, skip it.
6. 90’s Half Pony

The 90’s half pony reads differently on a grown-out chin-length cut than it did on the original super-straight, waist-length version. Placement is what saves it from looking like a costume. Set the pony at the crown, not higher, so the line from your ear to the elastic tilts upward rather than pulling vertical. That angle matters on short hair because there is less weight to anchor the shape.
Leave out a small triangle of hair at the front and the pieces along your hairline; let them fall where they want. Those wispy ends are the update. The original look depended on shellacked perfection, but on a 2024 bob with some texture already in it, the stray pieces read intentional. Fluff the pony itself with your fingers so it sits slightly proud of your head rather than slicked flat. If the crown falls, which it does on shorter layers, tease with a tail comb and mist with hairspray for hold. A flat iron bent through the loose hair underneath keeps the whole thing modern rather than matronly.
7. Alluring Curled Hairstyle

Looser curls keep a bob from looking shorter than it is, so the tool and the direction both matter. A wand around ¾ to 1 inch gives the right bend without shrinking the cut, and wrapping away from the face opens everything up. On a bob, that backward direction only works if you section from the nape forward; otherwise the front pieces tangle underneath and you lose the sweep. I start at the neck, work toward the crown, and save the face-framing layers for last so the angle stays consistent. The top and bottom of each strand stay straighter for a relaxed finish, and I leave the ends out of the clamp entirely. Hold is light, not springy, and the whole thing takes under ten minutes once the parting is clean.
8. Elegant Bun Hairstyle for Short Hair

A low bun on short hair lives or dies on whether the twists read as architecture or desperation. The trick is using them as filler where length would normally wrap, building shape deliberately instead of pinning stray ends wherever they land.
Start by taking a few strands from the front and one side, twisting them back and pinning just off-center. Then cover those pins with a twisted strand from the opposite side, working your way across so each twist conceals the mechanics beneath it. The remaining tail gets twisted and pinned underneath, with the earlier twists creating the bulk and structure a longer ponytail would have supplied.
Pre-curled hair makes the whole process faster, since the bend gives the twists natural grip and hides any shorter layers that refuse to stay put. For a polished finish, a side part and smoothed lengths keep the look intentional; a light mist of hairspray and U-shaped pins rather than standard bobby pins secure larger sections without the metal peeking through.
9. Upside Down Faux Braid Into a Bun

A high bun on short hair usually means loose pieces sliding out the back before lunch. The upside-down faux braid fixes that by building a grip chain from the nape upward.
Start at the hairline with a small ponytail, then add another half-inch above it. Split the bottom tail in two, wrap both strands around the base of the next pony, and secure the ends with a fresh elastic. Repeat until you reach the crown. Each loop creates length you do not actually have, stacking into a braid that looks like a French but pulls apart in seconds instead of minutes.
Gather the remaining hair with the tail of the chain and pin the bun high, right at the back of the crown. Too low and the braid collapses against the neck; too far forward and the profile looks off. The sweet spot sits where the skull starts to curve downward.
10. Short Hair Bun with Curled Hair

Curling before you pin changes everything about how a short-hair bun behaves. The waves give the bobby pins something to grip, so the bun stays put without a hundred pins digging into your scalp. Loose waves hold better than tight curls for this exact reason: tight curls spring back and fight the pin, while a relaxed wave molds where you press it.
The trick is leaving the right pieces out. Pull the upper section into a ponytail, loop it through the elastic only halfway, then wrap loose strands around that base and pin. Leave the side strands softer, securing them at the back with just a few pins and tugging the top slightly for volume. A light spray locks it without the helmet effect, and if the occasion calls for it, a small piece of hair jewelry at the bun base finishes the look without competing with the texture.
11. Front Dutch Braid

A Dutch braid sits tight against the scalp, which means you do not need length past your crown to make it work. The braid itself becomes the style, not the tail you finish with.
For short hair, start at the front hairline with three small sections. The Dutch method means crossing each side piece under the center strand instead of over, so the braid pops outward rather than lying flat. Work straight back toward the crown, adding only the hair directly beside each section as you go. Once you reach the highest point of your head where your hair is longest, secure the end with a small elastic or cross two bobby pins in an X to lock it in place. The lower strands that are too short to reach simply fall free, framing the face or tucking behind the ears.
Texture helps the grip. A mist of dry shampoo or sea salt spray before you start keeps shorter pieces from sliding out of the braid. Straight hair works too, though the hold takes more attention at each step.
12. Hollywood Waves into a Low Bun

Hollywood waves on short hair need a deliberate S-pattern, not random curls, or the finished bun collapses into frizz. A three-barrel iron set to about one inch wide clamps each section into that continuous wave shape. The barrel width matters because smaller barrels on short hair overcurl the ends; larger ones slip out before the wave sets.
The low placement is what lets this work on shorter cuts. Hair gathered at the nape, not the crown, means two-inch ends still reach the elastic and the remaining gap hides inside the bun itself. Leave a one-inch section free at the hairline on each side before you tie the ponytail. Those pieces get waved last and pin underneath, covering the point where ponytail meets scalp.
For the bun, pull the ponytail only halfway through the elastic to form a loop, then wrap and pin the loose ends around it. The loop gives structure; the wrap hides the transition from waved hair to gathered hair. A U-shaped pin, not a standard bobby, secures larger sections and sits flatter against the head. Choose one close to your color and the pin disappears entirely.
13. Halo Braid with Short Bob

A halo braid on a short bob looks like one continuous crown, but the length rarely cooperates. Two separate Dutch braids, one from each side of the part, solve the gap. Work only the hair around the crown and leave the lower strands loose; on a bob, those ends are too short to contribute and only pull the braid out of shape.
The join matters more than the braiding. Where the two braids meet at the back, cross them and pin under the occipital bone, that rounded bump at the base of your skull. The bone hides the hardware and the natural curve of the head holds the pin more securely than flat scalp skin. Tuck any tail ends into the opposite braid before pinning so nothing pokes out.
Dry shampoo or sea salt spray before you start gives the short layers enough grip to stay put. The whole style takes a few minutes and holds through a day at the beach or a night out, though the shorter your bob, the more critical that occipital placement becomes for keeping the crown from sliding up.
14. Faux French Braids into Pigtail Buns

Short hair makes real French braids tricky, since there is rarely enough length to weave three strands all the way down. The faux version solves this with simple knots that read as a braid from the front. Start with a center part and work one side at a time. Take two small sections at the hairline, cross them into a half-knot, then feed in a little more hair to each strand before crossing again. Repeat until you reach the nape, then twist the remaining tail into a low bun and secure it. The second side mirrors the first. Two small pigtail buns finish the look, and the whole thing sits comfortably in casual territory: errands, coffee, a low-key weekend. Dry shampoo or sea salt spray beforehand adds the grip that keeps the knots from slipping out before noon.
15. Elegant Mohawk Updo

Teasing the center strip into soft volume is the move that separates a flat attempt from an actual mohawk shape. I take a fine-tooth comb and backcomb just the middle three inches of hair, working from crown toward forehead, then smooth the surface layer with the comb’s clean side so the texture stays hidden. The sides need to lie completely flat against your head, pinned with crisscrossed bobby pins that grab both hair and scalp for hold that survives an evening.
This style solves two short-hair problems at once. For a pixie growing out through that shaggy mullet phase, the teased center uses length you already have while the pinned sides tame the pieces that would otherwise stick out at odd angles. On a deliberate undercut, the contrast between shaved sides and the lifted center strip becomes the whole point, no extra length required. I have seen this done with as little as four inches on top, though five or six gives you enough to roll the front slightly backward for a cleaner silhouette.
The trick that took me longest to learn: mist the teased section lightly with dry shampoo before you start, not after. It gives the backcombing something to grip so the height lasts past the first hour.
16. Easy to Manage Bandana Style

A bandana and a chopstick curler are all this style asks for, which is probably why it stuck around from the 1950s. The fold matters more than most people think: a width of about three inches keeps the fabric sitting flat without bunching at the crown. Place it from the front hairline straight back to the nape, or reverse it for a deeper crown placement that leaves more hair free below.
The exposed ends need curl to sell the vintage reference. Straight ends underneath a bandana read as messy; curled ends read as intentional. Work in small sections, and if the hair is on the thinner side, alternate the curl direction. One section toward the back, the next toward the face. The opposing directions push the hair outward and give the volume that a bandana alone will flatten.
Tie the knot on top, loosen the curls with your fingers rather than a brush, and set with hairspray. The whole thing takes maybe ten minutes once the folding becomes habit.
17. Beautiful Curls for Short Hair

Short hair sets faster and holds longer than long hair because the curl pattern has less weight pulling it out. A conical curling iron, wider at the base and tapering to a narrow tip, builds the most volume at the root where short cuts need it. I wrap combed, smooth sections from the bigger end toward the tapered end, which stacks the curl rather than letting it fall flat.
For drying, a diffuser attachment changes everything. Flip your head forward so the roots dry upward against gravity; the lift starts there, not from backcombing later. The diffuser’s fingers spread airflow so the curl forms without the blast that frizzes short layers.
Heat protection spray goes on before any tool touches the hair. On short cuts, the ends are closer to the scalp’s oils but also closer to repeated heat, so the protection matters on every section, not just the tips. Once the curls cool, running fingers through them loosens the shape to something relaxed rather than tight. The set holds through the day because the shorter strand has less length to straighten itself out against.
18. Quick Change with One-Day Color Spray

Temporary color spray sits right at the sweet spot for short hair because the payoff shows up fast without the hours a dye job demands. On a pixie or bob, the color reads loudest where hair is already lifted or pre-lightened, so spraying the crown and the ends that catch light gives the most visible shift. The scalp needs a barrier first: a thin line of plain moisturizer along the hairline and part keeps the pigment from staining skin, and a towel draped over the shoulders catches overspray that would spot a shirt collar.
L’Oreal’s Colorista line in blue or rose gold covers this ground well, and the bottles are easy to find at most drugstores or salons. After spraying, letting it dry for a full minute before adding hairspray locks the color in place instead of turning it muddy. The next morning, standard shampoo washes the pigment out clean; no residue, no commitment, no roots to manage. For anyone who wants to test a shade before taking it permanent, or just needs one night of something different, this is the lowest-stakes move in the kit.
19. Hairbands Hold It All Together

A thin hairband on short hair tends to slide backward within an hour, while a band wider than an inch can look like a leftover from middle school. The sweet spot sits between half an inch and three-quarters: enough surface to grip, narrow enough to read as intentional. Placement matters more than width, though. Slide the band about two inches back from the hairline, not right at the roots, and let a soft layer of hair fall forward to break the line. That single adjustment keeps the look adult rather than costume-y.
Materials separate the bands that stay put from the ones that migrate or snap fine strands. Velvet and ribbed cotton both create friction against the hair shaft without relying on tight tension. Satin and basic elastic slide too easily on shorter lengths, so they demand a tighter fit that stresses the edges. My own collection shrank to three velvet bands in neutral colors after I realized patterned ones limited what I could wear them with, and the narrow elastic ones kept leaving dents by noon.
20. Perfect Blowout for Short Hair

A round brush on chin-length hair needs a 2-inch diameter barrel to grab enough hair for real tension without looping so many times you cook the ends. Collarbone-length layers can handle a 2.5-inch or even 3-inch brush; the extra surface area smooths longer strands in fewer passes, which matters more than the heat setting you chose.
Tension, not temperature, is what builds the volume that lasts past noon. I hold each section taut against the barrel, rolling from root to midlength while the dryer follows the brush path. The hair should feel pulled, not yanked; a boar bristle mix helps distribute the stress so you’re not frying one wet patch while another stays damp underneath.
The cool-shot button is not optional finishing theater. Hot air sets the hydrogen bonds into the shape you just built; a full blast of cool air for 15 to 20 seconds resets those bonds in the stretched, lifted position. Skip it and the round-brush body collapses by lunch. I do the cool shot with the brush still wound in, then roll it out slowly so the ends keep the bend I paid for.
21. Easy Updo for Short Hair with Bobby Pins

Short hair forces you to rethink what an updo even means. Without the length to twist into a bun, you’re working with small rolls and strategic placement, and the tool choice matters more than you’d expect.
The crisscross pin method is what actually holds hair that short. Slide one bobby pin in horizontally to catch the hair against your scalp, then cross a second pin over it at a slight angle so the two form an X. The tension locks them in place without any grip from the pins themselves, which matters because short layers slip out of a single pin within an hour.
U-pins outperform flat bobby pins on short hair because the curved legs grip from both sides and the open shape lets you weave them through a section rather than clamping over it. Flat pins rely on the tension of the bend, which fails when there isn’t enough hair to fill it. On a pixie or layered bob, a flat pin either slides out or creates a visible ridge; a U-pin disappears entirely.
Hide them where the hair naturally overlaps. At the base of a rolled section, the top layer casts a shadow over the pin. Behind the ear works too, since the curve of your skull keeps the pin from catching light. Jennifer Lawrence’s messy twists at a Dior show in Paris used exposed pins deliberately, but for everyday wear, the goal is placement you forget about by noon.
22. Fishtail Dutch Braided Bangs
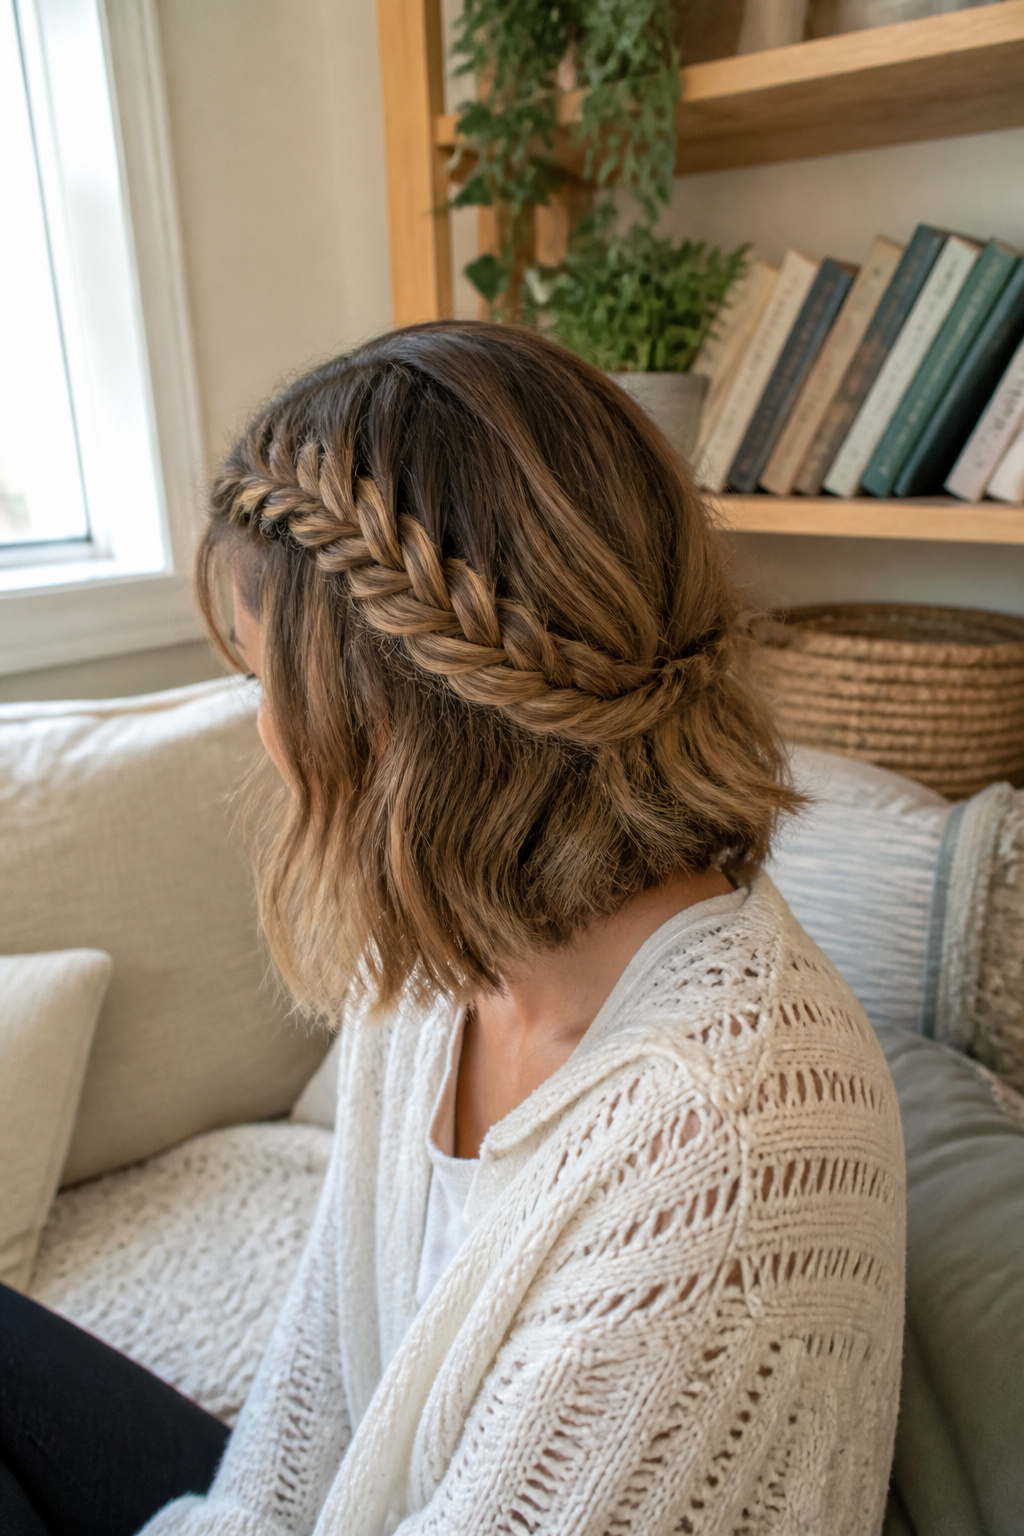
Growing-out bangs hit a stage where they skim the eyelashes but refuse to tuck behind the ear. A fishtail Dutch braid along the hairline solves this without committing to a full trim. The Dutch method keeps the braid raised and visible even on shorter layers, since it runs close to the scalp rather than dangling freely.
The technique works with two strands, not three. Each outer piece crosses under the center, and you feed in tiny sections of fringe as you move toward the temple. Direction matters: braid toward where you want the finished plait to rest, usually sweeping back and away from the face. Once the braid clears the awkward mid-cheek length, a clear elastic at the end keeps it discreet. Dry shampoo on the tail adds grip so the short ends don’t slip free, and gently pulling the outer strands loosens the shape so it doesn’t look too tight against the scalp.
This style shines during that four-to-six-week window when bangs are too long to wear down but too short to blend with the rest of the cut. Textured hair holds the braid better and builds more volume, though straight hair works if you accept a flatter, more minimal look.
23. Stars for Your Hair

Star stickers on short hair only work when the placement reads as a pattern, not an accident. On a pixie or bob, the eye has less area to travel, so scattered placement looks like lint caught in a draft. A short row tucked behind one ear, or a tight cluster at the temple, gives the brain a focal point to accept.
The source material mentions hairspray as the setting step, but the real risk sits in the removal. Stickers with aggressive adhesive, or any left in place past the event, lift the cuticle on fine short hair where every strand shows surface damage. A dry peel is the mistake; saturating the sticker with a lightweight oil or conditioner first lets the adhesive release without that tearing motion. Short hair lacks the length to hide a roughened patch, so the oil soak before removal matters more than the spray that holds the look.
For placement that photographs well, the sticker edge should sit flat against the scalp, not propped on the hair’s curve. A fingertip press after application, held for a few seconds while the adhesive warms, does more than a second coat of spray.
24. Basics for Short Hair Styles

Hair wax is the one product that changed how my short cuts look lived-in rather than helmet-like. The trick is emulsifying it between your palms until it turns from opaque to nearly clear. Skip that step and you get clumps that sit on top of the hair instead of dispersing.
Short hair shows every extra gram of product. What would vanish in long layers becomes visible weight on a pixie or bob. Wax belongs at the ends and mid-lengths, where it separates pieces and creates that intentional, piece-y texture. The roots are where restraint matters most. Bulk there lifts the silhouette in the wrong direction, giving a rounded shape that reads dated rather than modern.
I learned the hard way that less reads as more when there’s less hair to absorb it. A dime-sized amount, properly warmed, often does the whole head. The finish should look like you might have just run your hands through dry hair, not like you worked product through with intention.
25. French Braid Mohawk

A Dutch braid sits tight against the scalp, which means you do not need long hair to make this read as intentional rather than a stopgap. The center section gets braided from the hairline back, with the sides either shaved down or cropped close enough that they frame the braid like negative space.
The difference between edgy and unfinished comes down to tension. A loose Dutch braid on short hair looks like you ran out of length; a tight one with the strands flipped under the center piece, not over, reads as architecture. Textured hair helps here, since the grip keeps everything locked in place and the slight puff at each section adds volume you cannot get from straight hair lying flat.
If your sides are not shaved, the style still works. Keep them clipped very short, almost to the scalp, so the braid dominates the silhouette rather than competing with bulk at the temples. Tie the braid at the crown or let it run to the nape, depending on how much length you are working with. The puffed effect, pulling gently at the top loops after you secure it, turns a basic braid into the statement piece.
Heat Protectant and Brush Choice

Short hair leaves nowhere for damage to hide. A scorched section at the crown or a cluster of split ends at the nape shows up immediately, and heat protectant spray is what keeps that from happening in the first place. Spritz it on before any hot tool touches your hair, and keep the temperature as low as your hair type will allow while still getting results.
The brush matters just as much. A natural bristle brush, like one with boar’s hair, glides through strands with less friction than plastic or metal, which means fewer broken ends on hair that has just been cut to a length where every millimeter counts. A wet brush works well too, but the natural bristles have the edge for distributing oils and keeping short styles smooth without the yank.
Step-by-Step Video Breakdowns

A tutorial only helps if the head on screen matches the one in your mirror. Pixie cuts need different sectioning than chin-length bobs, and the gap between those lengths is where most videos lose people. What convinced me, watching maybe thirty of these, is that the best creators show the back of their head without being asked. If the video never turns the model around, you will not know where the pins go.
Check the starting length before you press play. A style built for a cropped pixie will not translate to a lob that brushes the collarbone, and "short hair" covers more ground than most titles admit. The useful ones label the model’s exact cut in the description, or they demonstrate on two lengths in the same tutorial. Texture matters too, though the sources rarely say so outright: a wave pattern that holds a twist on its own needs less product than straight hair fighting the same shape. Watch for whether the creator mentions prep, not just the finished look. The difference between a style that lasts until lunch and one that lasts until evening usually happens in the first two minutes, off-camera.
Bobby Pins and Decorative Clips

On short hair, accessories do the visible work that volume used to do. A bobby pin isn’t hidden; it reads as the design, so color matching matters more than you might expect. U-shaped pins in a shade close to your own disappear against the scalp and hold larger sections than standard bobbies, which is useful when you’re tucking in the uneven strands that come with growing out a pixie or bob.
Width changes the whole proportion. A slim band keeps a sleek line on a close crop, while something wider starts to look like the style itself rather than the thing holding it. The same logic applies to clips: on collar-length hair, a single decorative piece at the side can replace a twist or half-up style entirely, doing the visual work without the pinning. I’ve found the dividing line sits around whether the accessory covers more surface than the hair it secures. Cross that, and you’re wearing the clip; stay under it, and you’re wearing the hairstyle.
Frequently Asked Questions
What are some easy hairstyles for short hair?
The article covers 25 options including topsy tails updos, French twists with small elastics, side twists pinned counter-direction, half-up buns with tiny braids, loop-and-knot updos, 90’s half ponytails, wand curls, low buns built from multiple twists, upside-down faux braids into buns, front Dutch braids, Hollywood waves into low buns, halo braids, faux French braids into pigtail buns, elegant mohawk updos, bandana styles, and temporary color sprays.
How can I style my short hair for a special occasion?
For events where you might be photographed, the loop-and-knot updo layers twists to hide pins and build volume. A French twist works on short hair if you secure the ends with a small elastic first and hide it inside the fold. Hollywood waves into a low bun uses a three-barrel iron for deliberate S-patterns that hold their shape when gathered at the nape.
What products should I use for styling short hair?
Heat protection spray goes on before any tool touches the hair, since short ends are closer to repeated heat. Dry shampoo or sea salt spray before braiding gives short layers grip so they stay put. Texturizing spray helps freshly washed hair hold styles that need some natural oil for friction. A workable hairspray misted after teasing keeps crown height in place without the helmet effect.