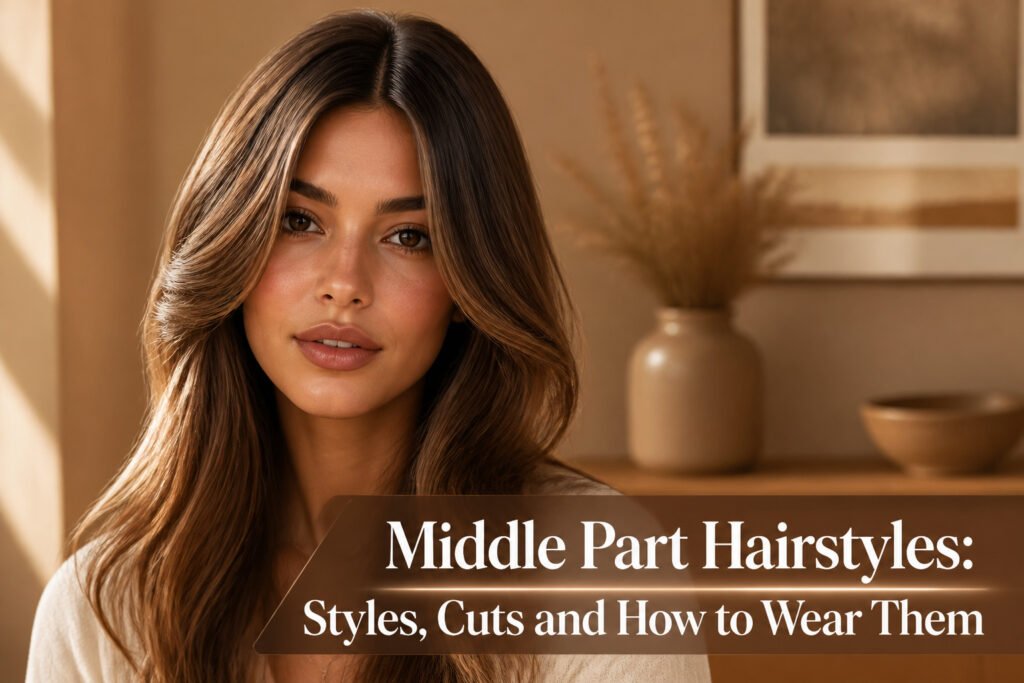
A middle parting hairstyle splits the hair down the center so it falls evenly to both sides, framing the face with symmetrical strands that can be worn straight, wavy, curled, or faded at the temples. The catch is that your face shape and hair texture determine which version actually works: oval and diamond faces handle the balance best, while round or square faces can look wider when the eye is drawn to both sides at once. The front pieces need real length to behave, reaching at least the tip of your nose when pulled straight down, or the part collapses flat against the forehead instead of arching into that soft M-shaped curve.
Middle Part Flow

Long layers that frame the face and sweep naturally to both sides give middle parting hairstyles their most effortless movement. The hair falls past the ears with enough length to create that soft, continuous flow without looking heavy or overdone. Blow-dry for bounce, then shape with styling cream to keep the strands soft and flexible. Past-the-ears length is the workable minimum for this shape; anything shorter fights the part rather than working with it. Sea-salt spray adds texture on days when you want a slightly rougher, beach-air finish instead of the polished cream look. The real advantage here is versatility: sweep the part aside when the mood shifts, and the layers still fall into place without a full restyle.
Middle Part Mullet

A middle part mullet pulls together two eras that do not obviously belong on the same head. The curtain-like front frames the face with a soft, parted flow straight out of the 1990s, while the back keeps the layered length and edge of a classic mullet. That contrast is the whole point.
Not everyone can wear the clash. Oval, diamond, and heart-shaped faces handle it best because the center part creates length and the face-framing pieces balance the volume at the back. Round or square faces can look wider when the eye is drawn to both sides at once.
The cut works because the layers do the heavy lifting. Rather than forcing volume with spray, the shape itself builds natural movement. A hair dryer at the roots gives the front its lift, then a small amount of texture clay defines the separation between the curtain and the tail without turning the whole thing stiff. The trick is keeping the two zones distinct: the front soft and flowing, the back piecey and deliberate. Too much product and it collapses into one generic shape; too little and the mullet loses its edge.
Billie Eilish ran this exact playbook, and the result read as flirtatious rather than retro. That is the balance to aim for.
Messy Middle Part

Loose waves falling naturally on both sides of a middle parting hairstyle carry a kind of energy that reads younger without trying hard for it. The trick is keeping the disorder controlled. What convinced me, reading through the techniques that actually get used, is that texture separates messy from lazy. Without it, the waves flatten into something that just looks slept on.
A dry oil run through cooled curls with your fingers gives that finished-but-not-fussed shape, and a texturizing spray underneath keeps the volume from collapsing by noon. Blow-dry for lift at the roots first, then let the waves cool fully before you touch them. The sources split on whether to part before or after curling; I’d part first if you want the waves to settle into that balanced frame, after if you prefer the part to look slightly broken in.
Middle Part Fade
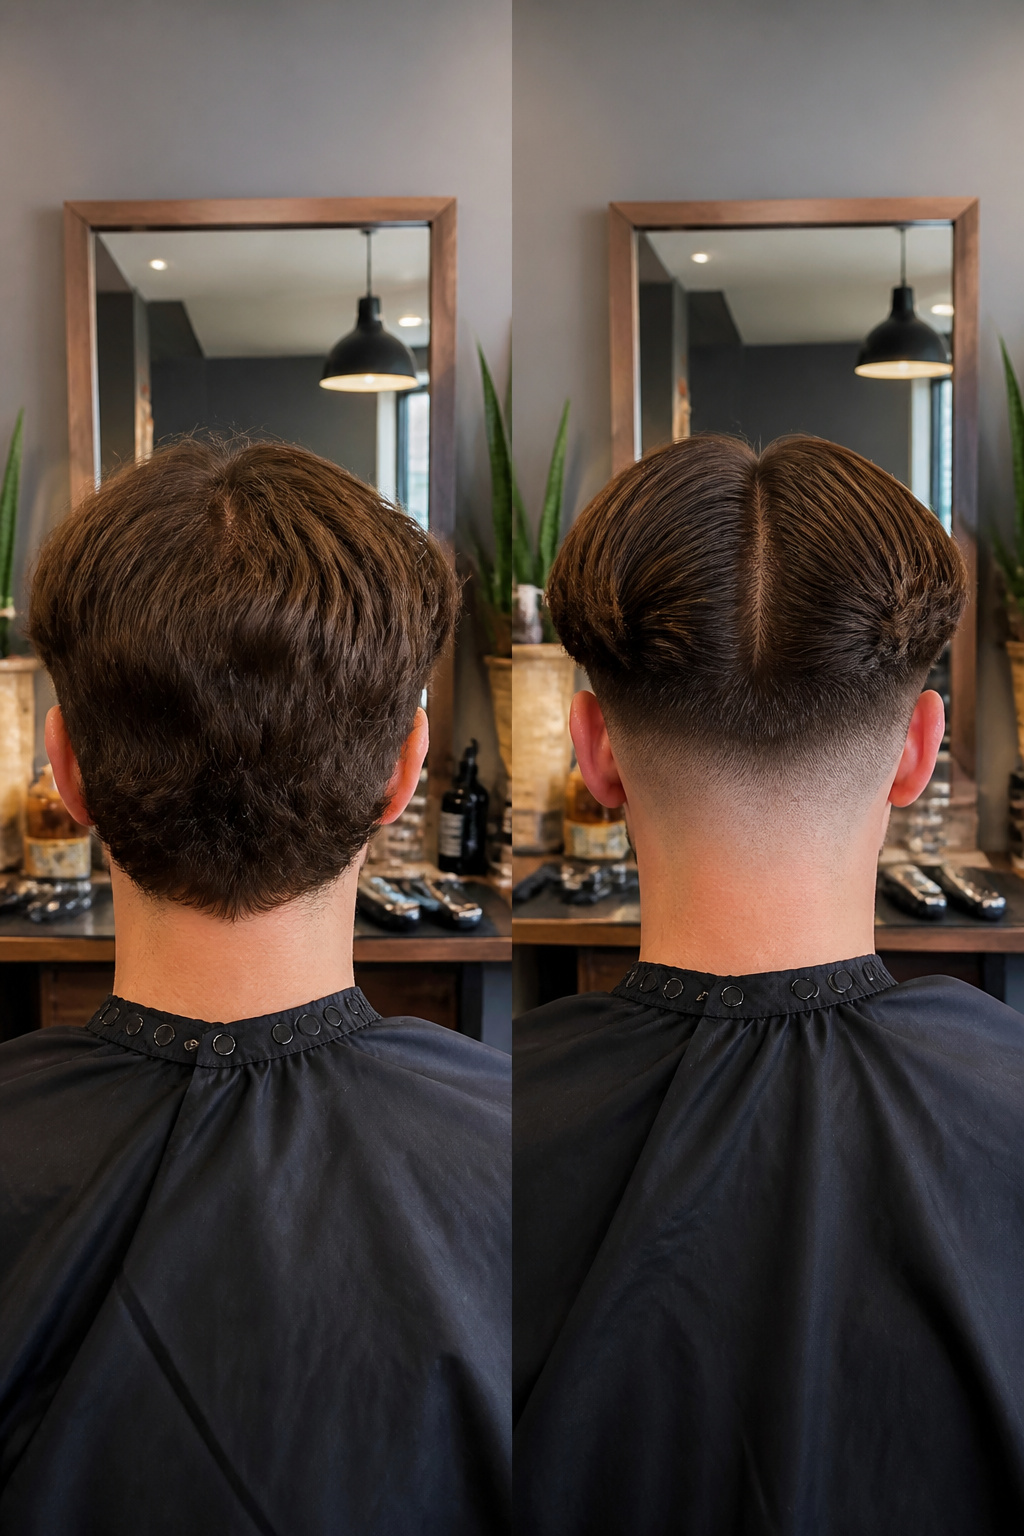
A middle part fade lives or dies by its gradient. The sides drop from near-skin at the temple to a whisper of length just above the ear, then climb to enough hair on top to part and sweep. That contrast is what keeps the style from looking like two haircuts stacked together.
The top needs real length to work. Most people can start styling when the front reaches the nose tip pulled straight down. Less than that, and the part sits flat against the scalp instead of falling with an S-wave that frames the forehead. The fade buys you structure so the flow on top can stay soft without the whole thing going shapeless.
Styling is straightforward: blow-dry upward for lift at the root, then work in molding paste to keep the strands defined. The fade does the heavy lifting on neatness, so the top can move. One side will always behave slightly worse than the other if your growth pattern has any asymmetry, but the fade’s sharp line distracts the eye from minor unevenness.
I would not go for a hard disconnect between the fade and the top unless your hair is thick enough to carry the weight. Fine hair needs that gradual transition or the part looks pasted on rather than grown.
Flat Middle Part

A flat middle part works best when your hair has enough length to fall evenly on both sides and your face shape can handle the symmetry. The style splits hair straight down the center, top falling neatly to each side with softly tapered sides for a clean finish. Blow-dry forward and guide the part with your fingers, then add a light styling cream to keep it controlled without looking stiff.
The literal problem shows up on fine or thin hair, where the part can collapse against your scalp and expose more than you intended. A cowlick at the hairline makes the center fight you; blow-dry with a root lifter on damp hair, working a flat brush back and forth until it settles. For the sleekest version, a flat wrap while blow drying followed by styling paste with oil before and after light flat ironing gives that glassy finish.
If your forehead is narrow or your hairline has a strong widow’s peak, the even split can look off rather than balanced. The flat middle part also demands regular washing; oil at the roots turns the clean geometry into something limp by midday. Skip this one if you want volume or movement, since the whole point is the suppression of both.
Soft Middle Part

A soft middle part keeps the hair split down the center but lets it fall forward with a gentle bend rather than lying flat against the head. The top carries loose, curtain-like movement while the sides stay tighter with a clean taper around the ears. That texture difference is what separates it from the flat version, which keeps the top medium-length and falling neatly to each side with a smooth, controlled finish.
The styling approach shifts too. For the soft look, blow-dry on low heat, then pinch and sweep with your fingers to build light movement rather than guiding everything into place. A styling cream finishes it, but the amount matters more here than with the flat version. Heavy product kills the effect instantly; the hair needs soft hold and clean shine without buildup so the curtains stay light and freely moving. I learned that balance the hard way after weighing my own hair down with too much cream the first few tries. The flat middle part can handle a slightly heavier hand since the goal is control, not bounce.
Medium Length Middle Part

The collarbone-to-shoulder stretch is where a middle parting hairstyle finds its balance: long enough to frame, short enough to keep the shape from swallowing your features. Hair split down the center with longer front pieces falling to each side works like soft curtains around the face, with the top staying fuller while the sides sit tidy and blend into a natural back length.
Layered cuts pair best with this symmetry, since the even fall on both sides lets the layers do their work without fighting the part. Blow-dry forward first, then open the part and sweep the hair away from your face with your fingers for the cleanest result. A light styling cream keeps the finish smooth without adding weight that would flatten the root.
The real limit here is bulk. Hair that is too heavy sits like a bowl and kills the movement that makes this length flattering. Strategically texturizing, especially with slide cutting or a texture razor, removes density so the front pieces can still get volume and flow slightly backward. Without that lightness, the style hardens into something that needs constant fixing instead of falling into place.
Blonde Middle Part

Lighter color does the heavy lifting in a middle parting hairstyle when you want dimension without bulk. The blonde sits wispier, catching light at the layers that fall around the eyes and cheekbones while the center split keeps the shape open. That placement matters: the part anchors the curtain so the brighter pieces frame rather than flatten.
The taper at the sides and back keeps the outline clean, which lets the softer top do its work. Blow-dry forward first, then split and finger-comb so the part lands where the color was laid. Part it the way you intend to wear it before any lightener touches the roots, or the dimension shifts the moment you move the line. Sea salt spray finishes it, airy enough that the layers stay light rather than sticky.
Skin Fade Middle Part
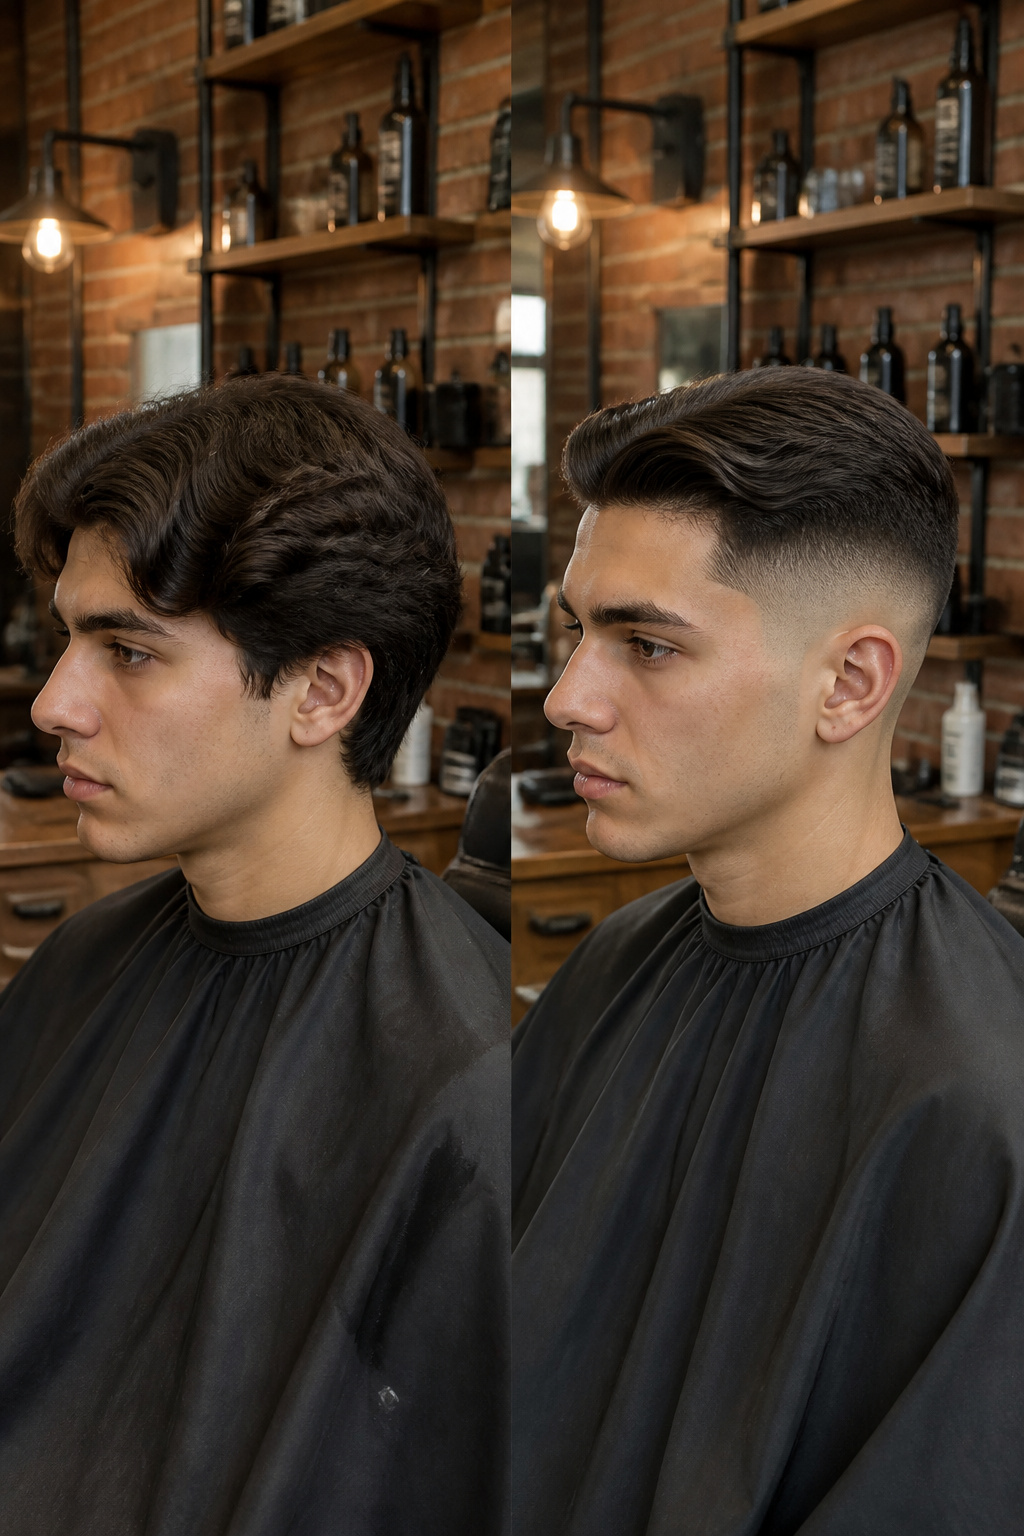
A skin fade middle part lives or dies on the contrast between the sides and the top. The fade drops to near-bald, while the hair on top stays long enough to split down the center and move with some flow. That sharp jump from skin to length is the whole point of the cut, not a detail to soften.
The top needs real length to behave. Most barbers will want enough growth to comb back before it falls forward into the part; finer hair especially needs extra time to get there. If the fringe is still catching, the sides and back can be shaped while the top grows out.
For styling, blow-dry the hair forward, then open the part with your fingers rather than forcing a hard line. A light styling cream holds the movement without turning the top stiff. The result reads sharper than a scissor-cut middle part, more deliberate, and it frames the face evenly because the fade removes bulk that would compete with the part.
Middle Part Taper Fade

A middle part taper fade keeps the top long enough to split and sweep back while the sides narrow in stages rather than shearing straight to skin. The difference from a standard fade is right there in the transition: a fade often drops to near-bald at the temple, but a taper keeps a quarter-inch or more of length and eases down gradually, so the contrast between top and side is softer.
The flow on top needs movement to sell the look, which means blow-drying for lift before you commit to a part. Sources describe using styling cream after the dry, not paste, to keep strands smooth and flexible enough to stay parted without locking into place. That cream-versus-paste choice matters: paste gives sharper definition, but on a taper the goal is a finish that reads natural rather than sculpted.
Frizz is what breaks the clean line between the flowing top and the tapered side. The smoother the top layer sits, the more intentional the taper looks, so controlling flyaways is part of the cut’s maintenance, not an afterthought.
Short Middle Part

Short middle parting hairstyles carry a clean, youthful energy that longer versions can’t quite match. The edges stay neatly trimmed, the maintenance stays simple, and the hair still shows enough movement and shape to avoid looking helmeted.
The front needs to reach at least the tip of your nose when pulled down straight for the part to read clearly against your forehead. Anything shorter and the hair won’t have the overhang to frame the face or the length to fall into that slight S-wave pattern that gives the style its signature M-shaped hairline. Without that minimum length, the part collapses into something flat and severe rather than soft and intentional.
Blow-drying for light volume at the root helps the shape hold. A small amount of molding paste keeps the part in place without stiffness, and the shorter overall length means the whole routine takes minutes. For anyone with a cowlick or widow’s peak, the symmetry of a strict middle part can fight against natural growth patterns; an off-center part that follows where your hair wants to split naturally often reads cleaner with less morning effort.
Low Taper Middle Part

Smooth tapering at the sides keeps the weight sitting low while the parted flow on top does the framing. The taper begins just above the ear, not creeping high toward the crown, which leaves enough bulk through the mid-section to let the middle split fall naturally without looking hollow at the temples. That lower starting point is what distinguishes it from a mid taper, and the difference matters if your face is rounder: the weight stays closer to the jawline, adding length rather than width.
Blow-drying for soft volume comes first, then a styling cream to hold the shape and add movement. The finish reads clean rather than dramatic, which makes it workable for most daily routines without looking like you are heading to a shoot. Ask your barber to keep enough length at the sides to tuck behind the ears if you want a softer line, or let the taper edge sharper for more contrast. Either way, the middle split itself does the face-framing; the taper’s job is simply to keep the perimeter tidy so the top can move.
Wavy Middle Part

A wavy middle part lives or dies by how much you fight your own texture. The sources split on method, and the split matters: one path is hot tools, the other is air and product.
If your hair already waves when wet, the lighter route wins. Blow-dry gently for volume, then work in sea salt spray to enhance the wave pattern rather than replace it. The finish stays airy, not crispy. I have watched enough tutorials to notice where this goes wrong: too much product, or combing after the spray goes in, and the wave separates into stringy pieces that read as dirty, not deliberate.
The hot-tool camp starts with a tail comb for a clean middle part, then curls underneath first with a wand or flat iron, working up to the hairline. Let the curls cool before you touch them. Run dry oil through with your fingers for the messy finish that reads modern rather than sloppy. The flat iron method specifically bends hair around a somewhat square surface, which gives a flatter, more relaxed curl than a round barrel; you can also leave the top and bottom of each section straight for that piece-y, lived-in look.
Two real choices, then: work with what you have, or build what you don’t. The first saves time and damage. The second gives you control on days when your natural pattern falls flat or dries uneven.
Textured Middle Part
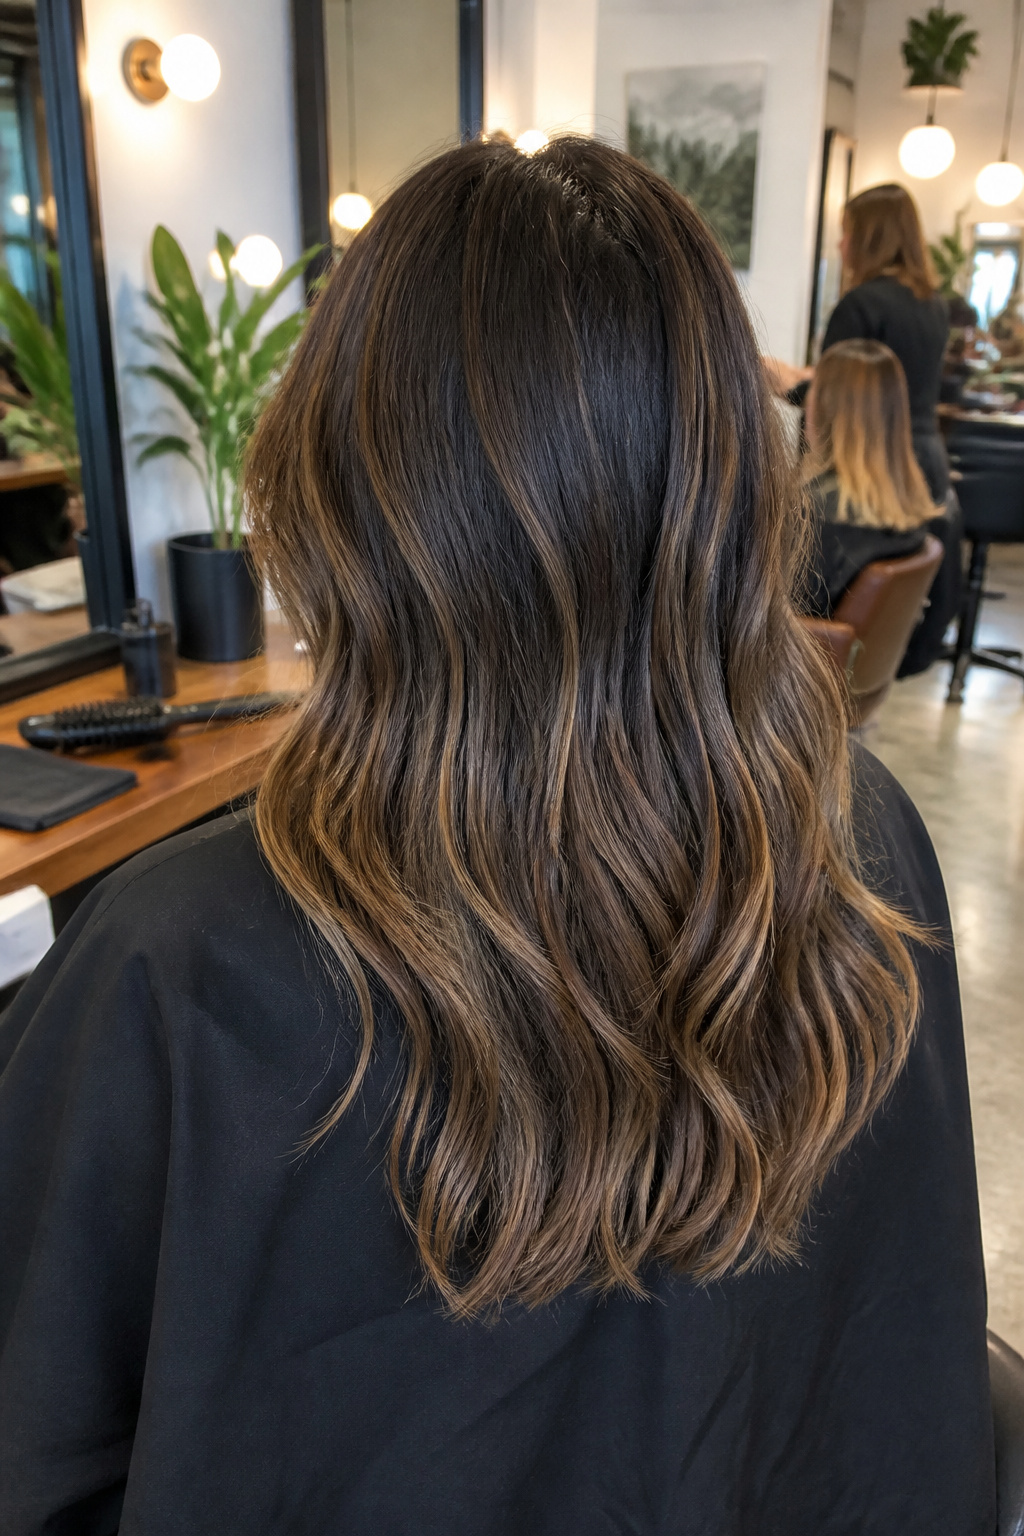
Texture in a middle part lives or dies at the cutting stage, and the wrong tool turns volume into wispy ends that collapse by noon. A texture razor removes bulk precisely where density pools, usually at the crown or through the back, without stripping the perimeter that frames your face. Slide cutting does the opposite work: the stylist glides shears across the surface, closing the blade partially to build directional movement that trains hair to sweep backward from the part. Used together, the two techniques keep layers light enough to lift but heavy enough to hold an S-wave pattern at the front hairline.
The front needs length to reach at least the tip of your nose when pulled down, or the middle part falls flat against the forehead instead of arching into that soft M-shape. Too short and you get the "hair-sniffing villain" effect; too heavy and the whole style sits like a bowl until you blow-dry it into submission. Blow-dry for lift at the root, then work a texture clay through the midlengths to separate strands and lock the shape without stiffness.
Curly Middle Part
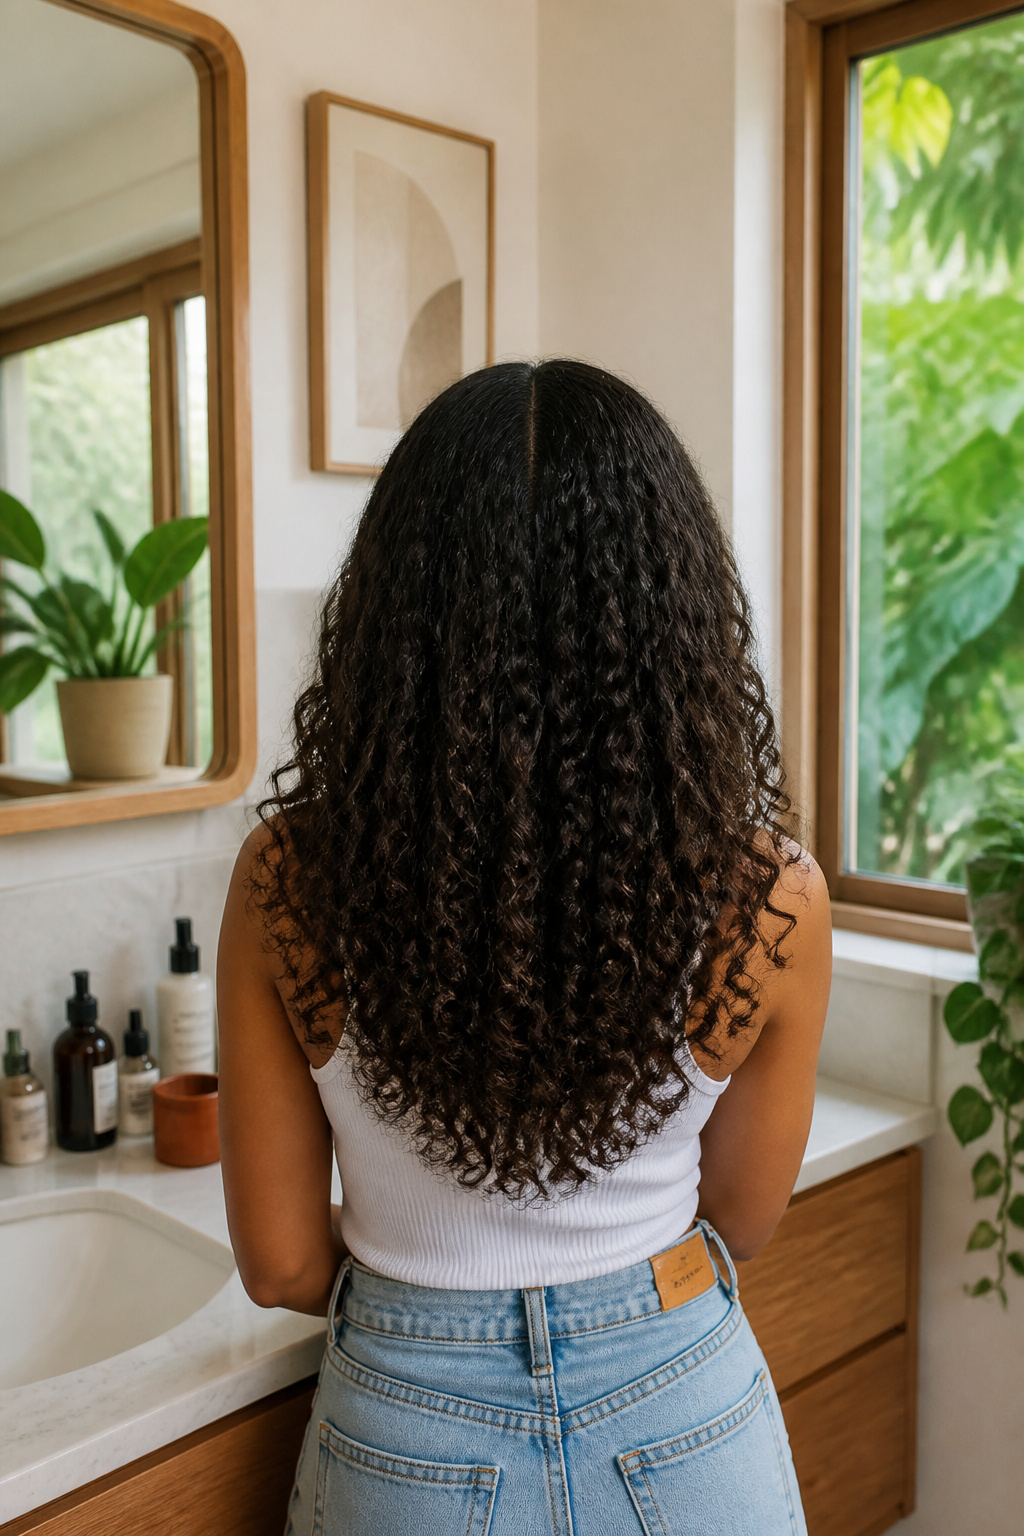
Curly hair split down the center lives or dies by moisture retention. The parting line exposes the scalp and lets the crown dry faster than the rest, which is why the curls there flatten first and frizz soon after. A middle parting on natural texture needs balanced flow on both sides, meaning each half holds roughly the same weight and spring so the face is framed evenly.
Moisture stays in the curls when you layer products onto wet hair, not damp. Curls cream applied right after washing, followed by gel, seals the cuticle before the parting line starts wicking water upward. A Denman brush or finger-coiling the face-framing sections keeps the definition where the part shows most. Diffusing with the head tilted, rather than upright, slows the crown’s drying time so both sides set at the same rate.
The mistake is making the part on day-two hair and expecting the curls to fall into place. Natural curls remember where they dried. The part has to be set wet, with product, or the center splits unevenly and one side collapses by noon.
Korean Middle Part

The Korean middle part lives and dies on length ratios that sound subtle until you try styling without them. The front needs to reach at least the tip of your nose when pulled straight down; anything shorter and the part falls flat against the forehead instead of lifting into that soft M-shaped curve at the hairline. Sides and back stay longer than you’d expect, often blending into the front rather than cutting short, which lets the layers sweep outward in one continuous motion.
Blow-drying comes first, always forward to build root volume, then you open the part and sweep each side away with your fingers while the hair is still warm. Styling cream finishes it, not pomade, not gel. The cream gives light hold and the smooth shine that keeps the movement looking intentional rather than slept-on. I have watched enough tutorials where the result turns bowl-cut heavy to know that skipping the blow-dry stage is the usual mistake; without that airy lift at the root, the longer layers collapse into a single block.
Slick Back Middle Part

A clean fade with swept-back flow looks sharp, but the tension matters more than most people expect. The hair needs enough length on top to comb backward before gravity takes over, or the style collapses into something closer to a true middle part that falls forward. Finer hair in particular needs extra growth to sit correctly; without it, the strands separate too early and the polished movement disappears.
Blow-drying backward builds the lift, then pomade locks the strands in place. The difference from a standard middle part is right there in the styling: a true part lets the hair split and frame the face evenly, while the slick-back version fights that natural fall with product and direction. The fade on the sides adds the contrast that makes the top look intentional rather than just grown out.
If the fringe is still too short, shaping the sides and back while the top grows out keeps the cut wearable during the awkward phase. The low fade route gives a softer landing than a taper fade for anyone who wants the swept look without the military edge.
Long Middle Part

Long hair past the shoulders gives a middle parting hairstyles look its most dramatic frame, but the length also changes how the part behaves. Weight pulls the strands downward, which keeps the center line cleaner than it sits on shorter cuts but can flatten volume at the crown. Layers that start around the jaw or below the ear break up that heaviness and let the part move instead of sitting like a drawn line.
Blow-drying for natural volume helps counter the flattening effect, and a styling cream keeps the layers soft enough to separate rather than clump. The real advantage is versatility: sweep the part aside and the length lets it hold a new position without fighting back. For anyone weighing this against a shorter middle part, the commitment is maintenance, not styling — long layers need the cream and the blow-dry, but the cut itself does the structural work of balancing the symmetry.
Middle Part Curtains

Long, parted strands that fall naturally to the sides define middle part curtains, a style that reads more 90s revival than the shorter, face-framing curtain cuts trending now. The difference sits in the length: true curtains graze the jaw or collarbone, while this longer version keeps going, sometimes past the shoulders, letting gravity do the work instead of layers.
The 90s reference is unavoidable. Back then the look relied on blow-dried shape and a light styling cream to keep the strands soft and flexible, not stiff. That same combination works now. What changed is the context; shorter curtain styles often pair with tapers or fades, blending long fringe with cropped sides. Middle part curtains skip that contrast. The length stays consistent, the part stays clean, and the movement comes from the hair’s own weight rather than cut-in texture.
For women who already check ingredient lists and judge by visible results, the appeal is straightforward. This is a low-manipulation style that still looks intentional. Blow-dry for shape, work in a styling cream, and the strands hold their frame without crunch. The face-framing happens naturally; there is no need for precise layering or daily heat beyond that initial dry.
Blowout Taper Middle Part

Lifted volume with sharp tapered sides is what separates a blowout taper middle part from the softer shapes. The parted top flows back with real movement, while the taper keeps the edges clean and intentional.
The blow-dry technique builds that height deliberately. Start right on the part itself, drying upward to set the defined line before it has a chance to fall flat. Work one side fully before touching the other: back sections blow toward the back, and as you move forward, a round brush lifts the hair more and more vertically. A medium round brush, roughly 2–2.5 inches in diameter, gives the right tension for volume without curling the ends under. Pinch the front sections with your fingers and bend them away from the face for that flicked, open shape. Symmetry comes from finishing one side completely, then matching it, rather than alternating and overworking the hair chasing balance.
Volumizing mousse before drying locks in the body, and a medium-hold styling cream after, something like Layrite Matte Cream or VERB Forming Fiber, keeps the shape out of your face while the hair still moves.
Two Block Middle Part
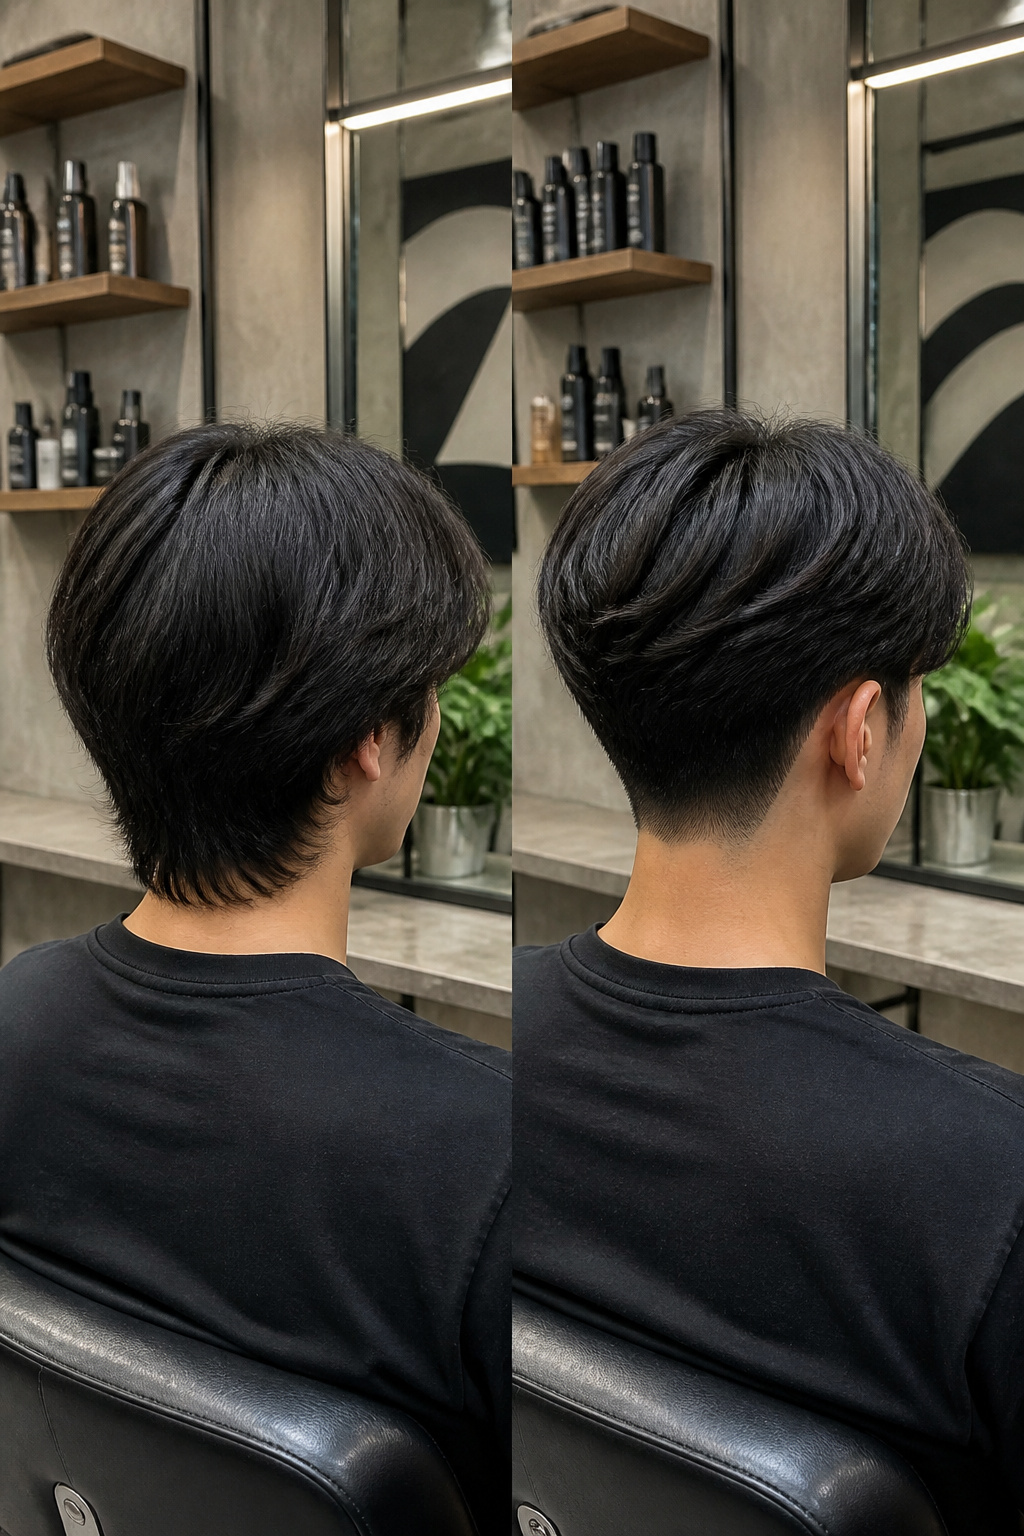
The two block middle part lives or dies on the disconnected length between top and sides. Long layers on top sit completely separate from shorter, tapered sides, and that sharp jump is what gives the cut its structure. Without enough contrast, the style collapses into a generic grown-out shape.
Most barbers shape the sides and back while the top grows out, so the cut evolves in stages rather than arriving finished. The top needs real length to fall properly; finer hair especially requires extra growth before it will sit into a clean part and frame the face with any movement.
Styling is straightforward: blow-dry for volume, then work in a styling cream to keep the strands soft and controlled. The parted flow should read as two distinct zones, not a gradual blend. Ask for a taper fade on the sides if you want the sharper, more defined read, or a scissor-cut middle part approach if you prefer enough length to tuck behind the ears for a softer finish.
Fluffy Middle Part

Airy volume without backcombing damage comes down to how the hair is dried, not how much product is piled in. The sources agree on the sequence: start the blow dryer right at the part line to set that center division while the hair is still moldable, then work one side fully before mirroring it on the other. Rushing both sides at once throws off the symmetry and leads to overworking the hair with heat.
The brush angle matters more than the brush itself. As you move from back to front, lift the hair more steeply toward the face so the roots stand away from the scalp. Pinch the ends with your fingers and bend them outward so they flick away from the face rather than falling flat. A lightweight mousse at the roots builds the structure before you start drying; a medium-hold styling cream after, something like Layrite Matte Cream or VERB Forming Fiber, keeps the movement without freezing it. Skip the teasing entirely: the height comes from directional blow-drying and the right amount of product, not from breaking the cuticle with a comb.
Burst Fade Middle Part

A burst fade curves around the ear in a radial arc, following the natural whorl of the hairline rather than dropping straight down behind it. That rounded path changes how the cut frames the face: instead of the vertical emphasis you get from a linear fade, the burst creates a halo effect that widens the appearance of the cheekbones and softens the jawline. The contrast sits right at the temple, drawing the eye outward rather than up.
Styling this cut starts with a hairdryer for lift at the crown. The layered top needs movement, and the defined middle part keeps the look from collapsing into a bowl shape. A texture clay finishes it, adding separation between the parted sections and holding the shape without stiffness. The result reads sharper than a standard middle part fade because the radial fade line acts like a built-in contour.
Mid Taper Middle Part

A mid taper starts higher than the low taper but stays below the temple, landing in that middle zone where the fade begins to show but does not dominate the silhouette. That placement leaves enough weight on the sides to support the parted flow on top without the harsh contrast of a high fade.
The middle split itself frames the face more softly than a hard side part, and the taper keeps the edges refined rather than abrupt. For styling, blow-dry the hair upward to build volume at the roots, then work in a styling cream to hold the shape while keeping the strands flexible enough to move. The result reads as intentional and current without looking overworked, which is why this cut travels well between offices and weekends.
The low taper option sits lower still, beginning closer to the ear and keeping more length through the sides. Choose the mid if you want cleaner lines around the head shape; choose low if you prefer the taper to whisper rather than announce itself.
Middle Part Straight Hair

Straight hair leaves nowhere for a middle part to hide. Every millimeter of asymmetry shows, and a part that wanders even slightly off center breaks the whole effect. A clean middle part on straight hair demands a ruler, not a guess: comb wet hair back from the forehead, find the center point between the brows, and draw the line straight back with a fine-tooth comb before the hair starts to dry.
The blunt cut middle part works best here because the even perimeter reinforces the symmetry. Without waves to add movement, the shape of the cut does all the visual work. A blow dryer with gentle lift at the roots keeps the style from falling flat, which straight hair will do without intervention. Styling cream after drying adds polish and keeps the strands flexible rather than stiff.
Matte paste or texture powder can add slight separation if the finish looks too severe, but the real priority is keeping the part itself sharp. Once the hair dries with the part set, it resists shifting. Let it dry any other way and you are fighting the rest of the day.
Middle Part Asian

A middle part on typically straight, coarse Asian hair lives or dies by how you handle the weight. The strands fall fast and heavy, which means the part can look limp by noon if you skip the prep. Blow-dry for light lift at the roots first, then work a styling cream through the lengths to keep the flow smooth without forcing it flat. The cream’s job is flexibility, not glue; you want the hair to move, just in the direction you set.
The real challenge is hold. Most products either sit on top and go greasy or stiffen into something that cracks by 3 p.m. For a middle part that stays symmetrical, you need root lift paired with enough control to fight the density. The Forte Series Extreme Control Kit is built for this specific texture: it gives volume at the part line and keeps the shape through the day without the stiffness that makes thick hair look helmeted. Your hair stays polished, not shellacked, and the part stays where you drew it.
Middle Part Perm

Tight curls with a middle parting live or die by where the perm rods sit relative to that center line. Place them symmetrically on either side, and the bounce frames the face evenly; shift even one section off-center, and the whole style leans lopsided by week three.
The curl pattern itself needs to be tight enough to hold definition, not so tight that the part disappears into a single mass. From what I have seen in salon workups, the best results come from wrapping the front sections away from the face on both sides, then meeting those spirals at the part so they mirror each other. That movement is what gives the style its energy rather than a static, helmet-like shape.
After processing, the drying method matters as much as the placement. A diffuser keeps the curl clumps intact; rubbing with a regular towel breaks them into frizz. A styling cream applied to damp hair seals the cuticle and keeps the softness that makes the perm look current rather than dated. The maintenance is light, but skip the diffuser step and the definition drops within a single wash cycle.
Layered Middle Part

Graduated lengths change how a middle part sits on the face. Without them, the hair falls in a single heavy sheet that widens toward the bottom and turns triangular, especially on thicker textures. Layers break that mass into pieces that move independently, so the silhouette stays narrower and the part reads as intentional rather than accidental.
The shortest layers should frame the face while longer ones continue below. On a bob, a double-layered cut with the center parting can make the face appear more symmetrical; if you have wider cheeks, the layers need to end below the cheekbone, not at it. Styling with a blow dryer for lift, then working a cream through the ends, keeps the strands flexible and the part clean without stiffness. The textured finish reads relaxed but still polished, and the movement prevents that helmet-like weight that kills the look by noon.
Modern Middle Part
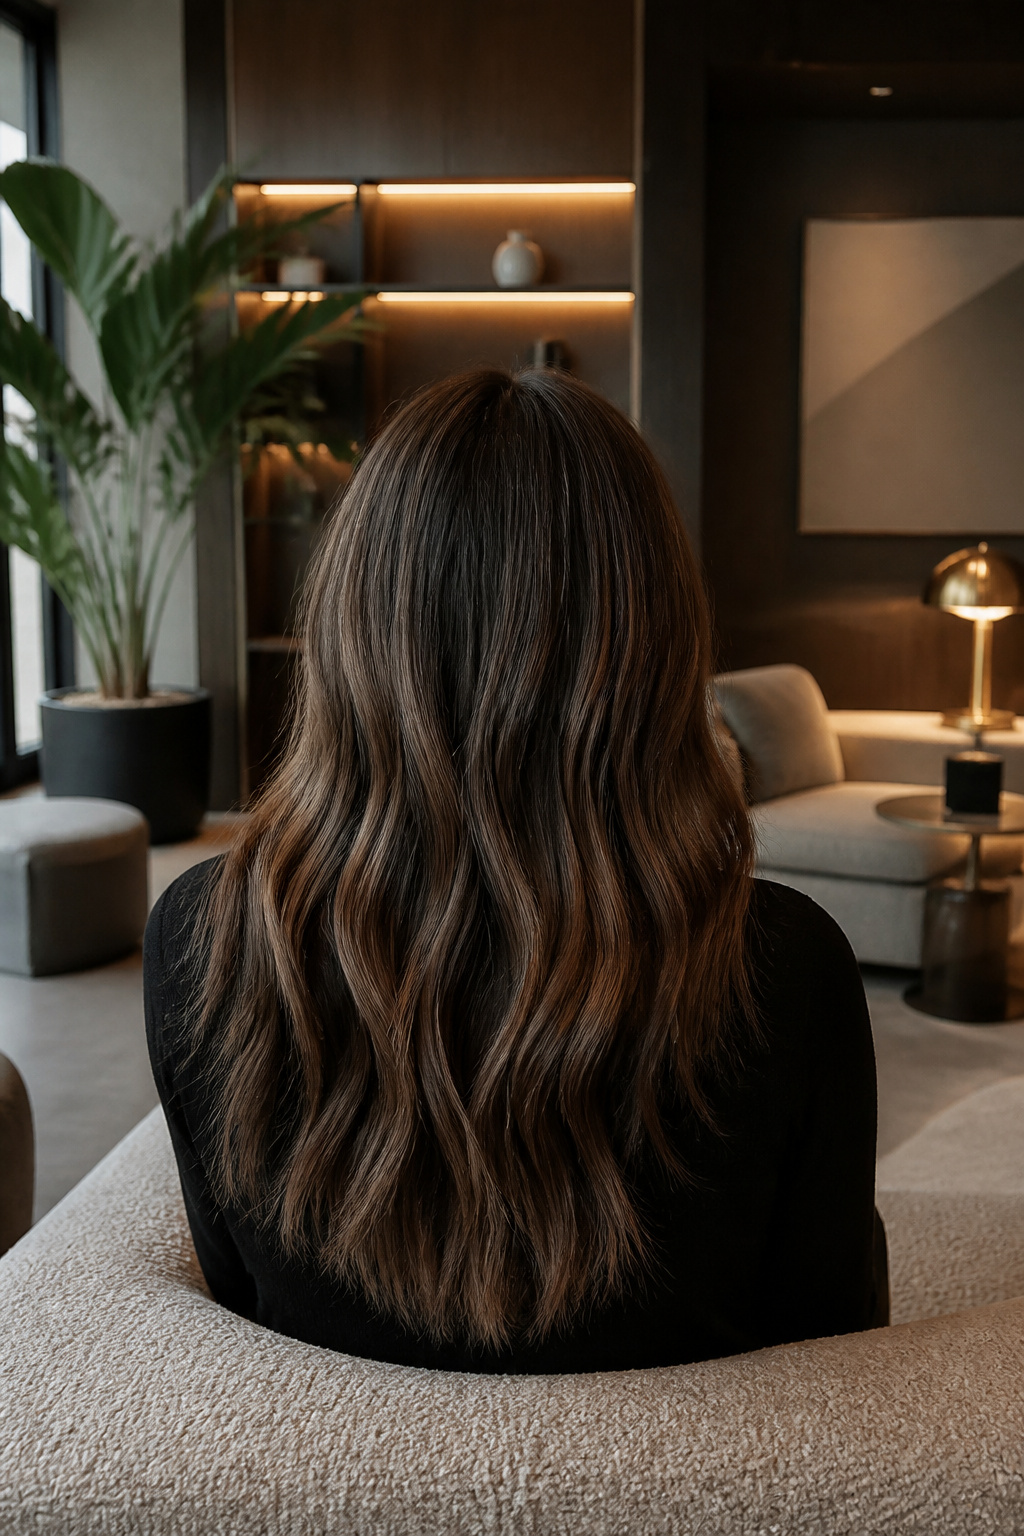
The modern middle parting hairstyles I see in salons now keep the clean symmetry that made the 90s version iconic, but the finish is deliberately different. Where Leonardo DiCaprio’s curtain look relied on heavy product and a stiff, molded hold, current styling aims for movement. Blow-drying starts right at the part itself to set that defined line, then a brush lifts the front sections upward to build volume rather than letting them fall flat against the face.
Lightweight mousse or texture spray replaces the old glossy creams, and the goal is hair that bends away from the face on its own rather than staying pinned in place. A medium-hold styling cream, something like Layrite Matte Cream or VERB Forming Fiber, keeps the shape flexible enough to shift during the day. The 90s version looked finished; this one looks like it happened on its own.
Wolf Cut Middle Part

The wolf cut sits at an odd intersection, half mullet and half shag, and without the right part it can look like you lost a fight with a lawnmower. A middle part tames the wildness by splitting the volume evenly so the shaggy layers fall in curtains rather than collapsing to one side. The longer top still moves, but the taper at the ends keeps the shape from reading purely retro.
Styling demands lift at the root or the whole thing goes flat. Blow dry upward for volume, then work in a texture powder to separate the layers and hold the part in place. Skip heavy product; the cut’s own layering is meant to supply the body, not forced volume from spray. What reads as effortless structure is really that balance between the mullet’s edge and the shag’s flow, held in check by where you set the divide.
Middle Part Braids

A middle part gives braids a symmetry that side parts rarely match, and the options run from barely-there to full scalp coverage. Mini French braids starting a half-inch back from the hairline add just enough detail to read as intentional without eating your morning; you section out a small chunk on either side of the part, braid toward the ear, and you’re done. Double Dutch braids push that same structure into sharper territory, though the part itself needs work: pomade and shine spray keep flyaways flat so the line reads clean rather than fuzzy. The difference between the two is tension. French braids sit on top of the hair and look softer; Dutch braids invert, sitting raised, and that dimension pairs better with a severe center line. Argan oil helps either style last without the frizz that breaks the symmetry, especially if you’re braiding freshly washed hair that wants to slip loose.
Old Money Middle Part

The old money middle part relies on length that brushes the collarbone or sits just below, never cropped above the jaw. Symmetry matters more than volume here; the part falls dead center and the layers frame the face with soft, equal curtains on each side. What separates this from a casual middle parting hairstyle is the finish: polished but never stiff, achieved with a small amount of styling cream worked through damp hair for shine and smoothness. Blow-dry forward first, then open the part and sweep the hair away from the face with your fingers so the front pieces fall naturally. The back stays tidy and blends without abrupt steps or heavy texture. Minimal product keeps the look understated, and the overall effect reads as grooming rather than styling. Straight hair carries this best; waves or curls need taming to maintain the clean silhouette that signals this aesthetic.
Classic Middle Part

The classic middle part starts with hair long enough to fall evenly past the jaw on both sides, creating that symmetrical frame people associate with Cher in the seventies or the quiet polish of Wednesday Addams. What keeps it from looking accidental is the part itself: drawn dead center with a comb, not fingered in after the fact, so the weight distributes clean and balanced.
Light layering through the ends keeps the shape from going heavy or triangular, and a dab of molding paste worked through dry strands holds the line without turning helmet-stiff. The sources back this up: a controlled, natural finish is the goal, not a shellacked one. Check the part every four to six weeks as your hair grows out; even a quarter-inch shift throws the balance.
Middle Part with Beard

Structured flow on top with a full beard below asks for balance, not just growth. The parted layers frame the face naturally, and the beard adds weight underneath that can either steady the look or fight against it. Too much volume on both levels turns the silhouette into a triangle; too little on top and the beard drags everything downward. What convinced me, reading through the guides, is that the taper on the sides matters more than the beard length itself. A clean mid-level taper keeps the edges refined so the top can carry some height without competing. Work in a small amount of styling cream to keep the hair smooth and flexible, not stiff. Blow-dry upward for volume first, then apply the cream for control. The beard should feel like the anchor, not the main event. If the facial hair runs thick, keep the top slightly shorter and more controlled; if the beard is patchy or trimmed close, the extra length and flow on top fills the frame without overcorrecting.
Middle Part with Low Fade
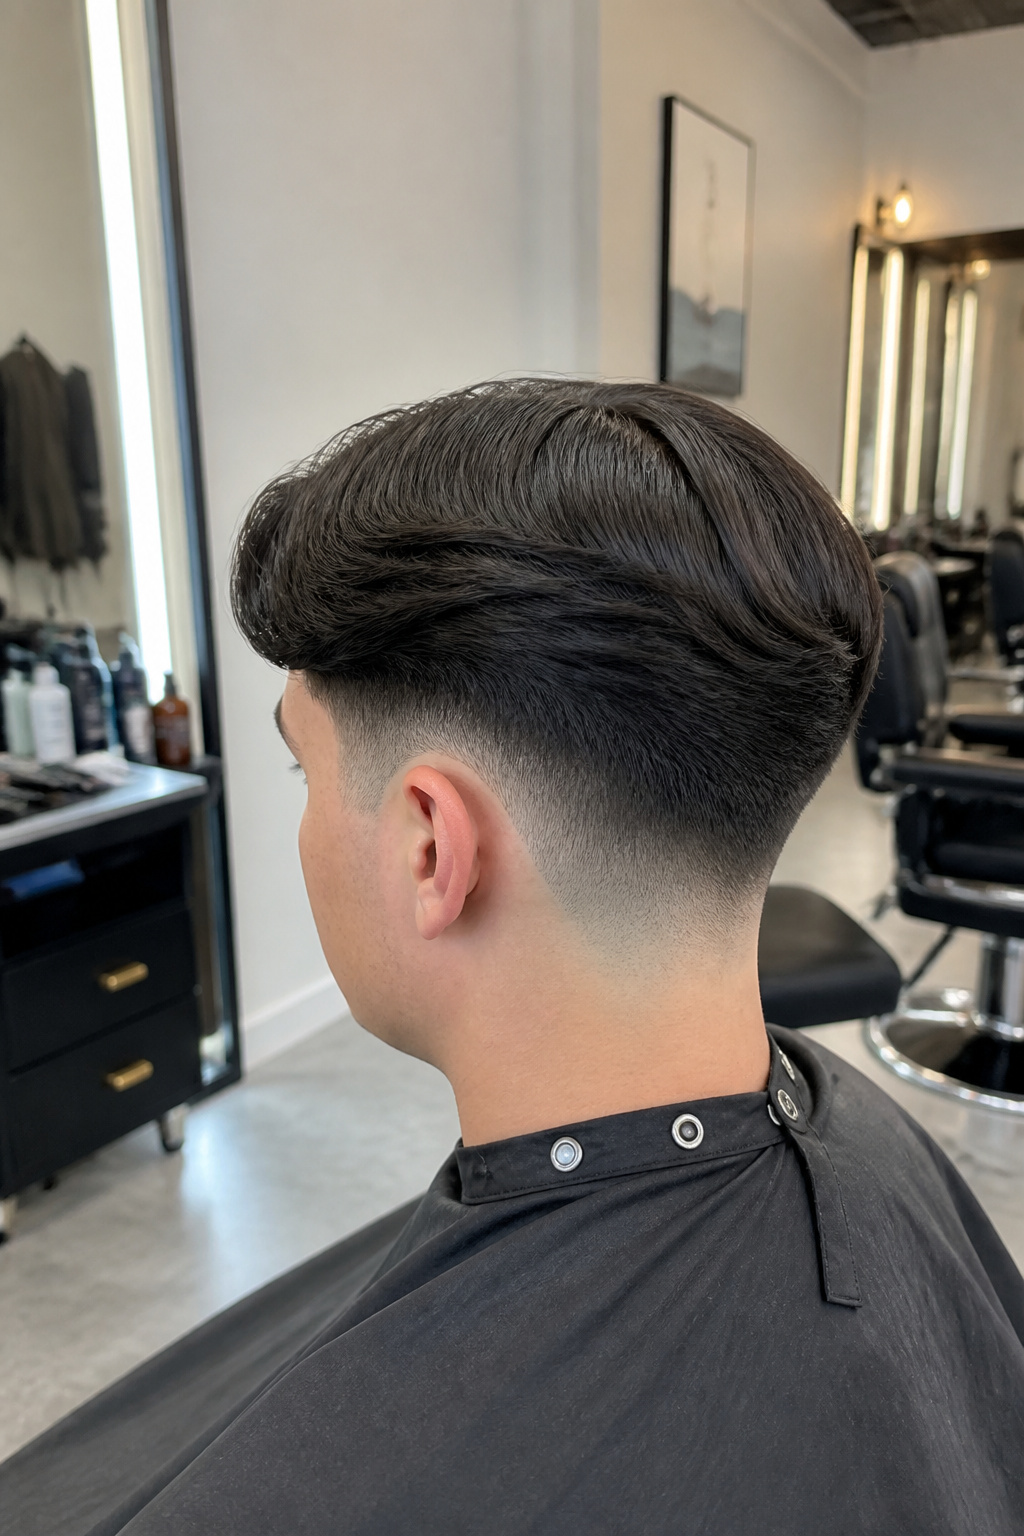
A low fade keeps the contrast low and the eye level, which is exactly where the part line sits. The fade starts just above the ear and stays tight, so the transition does not climb high enough to compete with the center split. What you get is balanced flow on top with sharp faded sides that frame the face evenly without pulling attention upward.
Styling this means directing hair upward with a brush, then working in molding paste to keep the strands controlled and defined. The paste locks the part sharp against the fade and maintains the balance on both sides. A hair dryer adds natural lift before the product goes in, which helps the part stay visible rather than collapsing into the length on top.
This cut reads fashion-forward because the fade does the structural work while the part does the framing. The low placement matters: a higher fade would split the visual focus, but here the sharpness stays at the jaw and the part stays at the center, and the two do not fight each other.
Middle Part vs Side Part

A middle part pulls the face into symmetry and even balance, which layered cuts especially like because the layers fall identically on each side. A side part breaks that symmetry to add structure and sharper definition, the kind of clean edge that reads more polished or intentional depending on the rest of your styling.
Face shape perception shifts with the choice. Middle parting hairstyles keep the forehead open and unskewed, which tends to read younger and works at almost any length where hair can fall forward. Side parts can shorten or widen how the face reads depending on where the part sits, though the exact effect changes enough from face to face that trial matters more than theory.
Styling effort splits the difference too. A middle part demands you finish one side fully, then mirror it; blow-dry from the part line outward, building volume at the front with a brush, and match the second side to the first rather than working both at once. A side part forgives more asymmetry because the style is already off-center, so the morning routine runs faster if your hands are still waking up. I reach for a medium-hold styling cream either way, something like Layrite Matte Cream or VERB Forming Fiber, to keep the shape without freezing it.
Middle Part vs Curtains

Both middle parting hairstyles share that clean center divide, but the length and intent split them apart. A true middle part keeps things simple: the hair falls with clean symmetry and natural flow, usually at a length where it moves but does not yet frame the face in panels. Curtains push longer, relying on face-framing layers that need enough growth to fall past the cheekbone and split into soft, movable panels.
Styling demands differ too. Middle parts often behave with minimal product, maybe a dab of styling cream if the hair fights the line. Curtains need more deliberate shaping: blow-dry for structure, then work styling cream through to keep the panels soft and flexible rather than letting them dry stiff or separated. The sources note sea-salt spray as an option for longer curtain styles, though that sits more in the maintenance column than the daily routine.
Where the two blur is on longer hair grown past the shoulders. At that point, hair naturally wants to fall into a middle part, and the distinction becomes more about whether you encourage those face-framing panels or simply let the mass divide and flow. My read: if your hair is still above chin length, you are wearing a middle part. Once it passes the collarbone and you are deliberately shaping panels, you have crossed into curtains.
Holding a Middle Part on Straight, Thick Asian Hair

A middle part on straight, thick Asian hair collapses fast. The weight pulls everything flat within hours, and once the part drifts off center, the whole look falls apart.
- Build lift at the scalp before you blow-dry. Texture hair powder worked into the roots gives both sides real volume from the base up. Without this foundation, the hair’s own weight wins.
- Blow-dry against the growth direction on each side. Direct the airflow from the part line outward, not downward, so the roots set with lift built in.
- Lock the shape while the hair is still warm from the dryer. Texture clay applied to warm hair sets the part defined, the sides lifted, and the finish matte. The hold stays clean, no grease, no stiffness, no restyling by midday.
- Skip anything that adds shine or slip. On dense Asian hair textures, those products speed the collapse. The matte finish from clay is what keeps the symmetry intact from morning to night.
Choosing the Right Middle Part
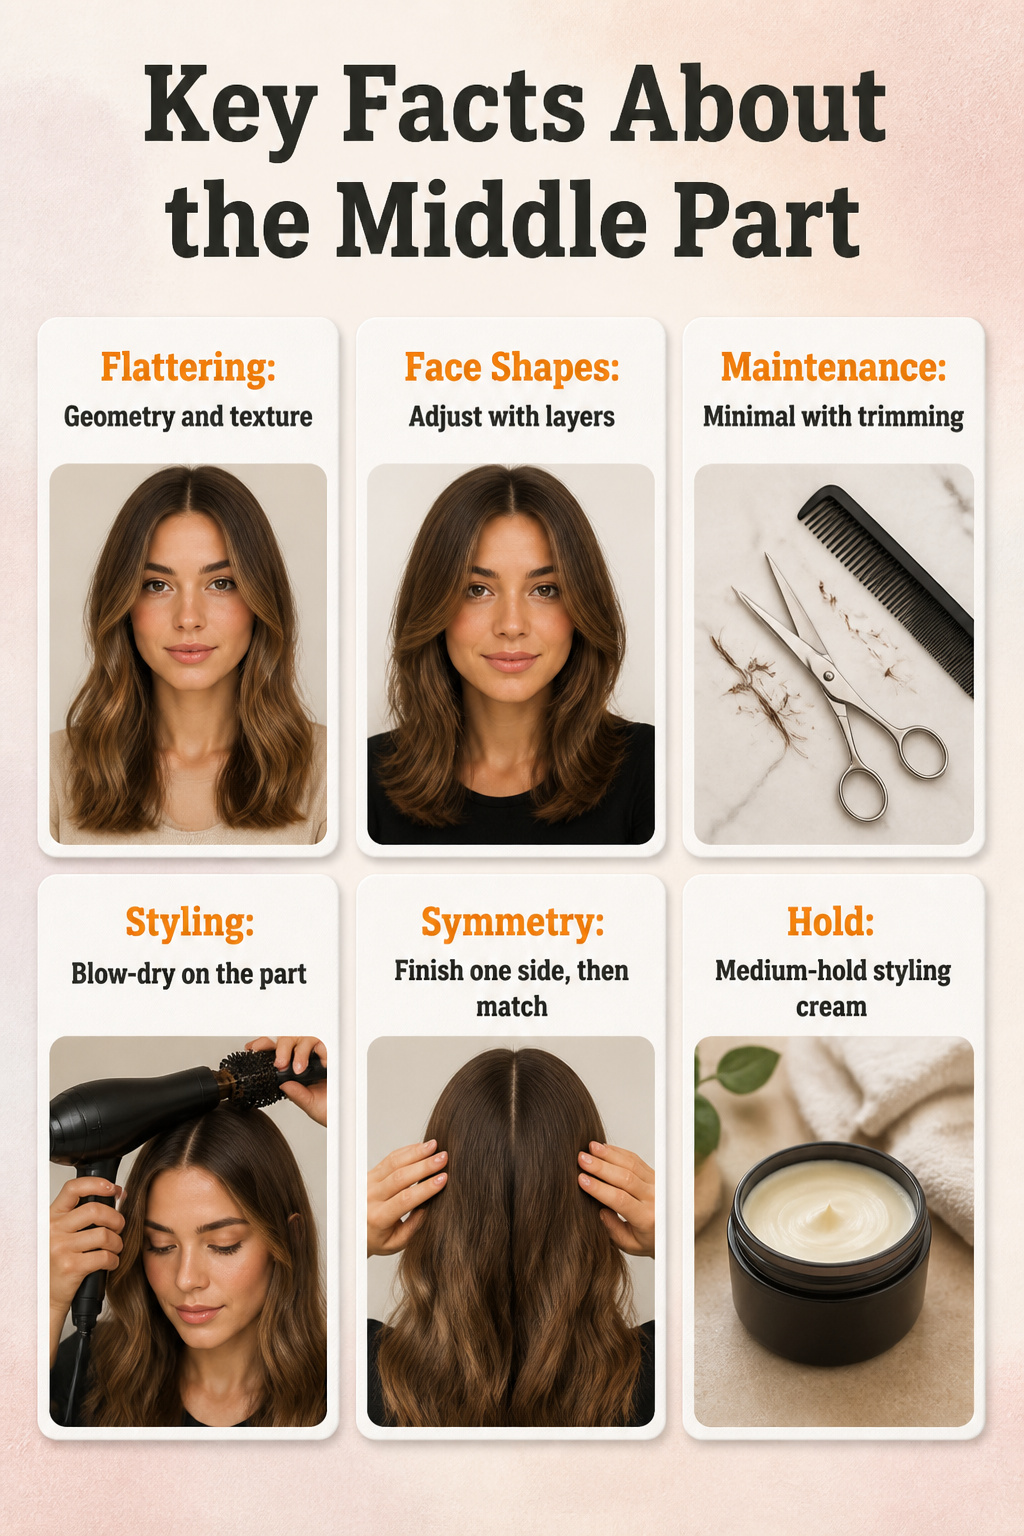
A middle part that flatters has less to do with trend than with the geometry of your own face and the texture you wake up with. Longer faces need the break of face-framing layers or a mid-length fringe to interrupt vertical length; teasing at the hairline so the front covers the forehead slightly keeps that balance in place through the day. Rounder or squarer jawlines, on the other hand, gain from the soft contrast that waves and a curtain fringe provide, letting the part frame rather than emphasize width.
Your daily capacity for styling matters as much as the mirror test. The short middle part keeps maintenance minimal with neatly trimmed edges and balanced flow; a quick blow-dry for light volume and a dab of molding paste holds the line without stiffness. More texture in your hair opens up the modern middle part, where subtle layers add movement and styling cream keeps the finish smooth but flexible after drying.
What convinced me, reading through the guidance on this, is that symmetry is the part’s whole point. Blow-dry right on the part itself to set that defined line, finish one side completely, then match the second to it rather than working both at once and overworking the hair. A medium-hold styling cream gives the soft, firm finish that still moves.
How to Style a Middle Part

- Start with wet hair and a comb to draw a clean center line from forehead to crown. Blow-dry right on the part first; the heat sets that line before the rest of the hair dries and the part stays put all day.
- Pick one side and finish it before touching the other. Dry the back section toward the back, then switch to a brush as you move forward and lift the hair upward to build volume. At the front, pinch sections with your fingers and bend them so they flick away from your face. Repeat the same steps on the second side, matching the height and texture rather than styling both at once.
- Work a medium-hold styling cream through dry hair for light control that still moves. The sources mention Layrite Matte Cream or VERB Forming Fiber, though any cream with similar hold gives that soft, firm finish without stiffness.
Frequently Asked Questions
What haircut goes best with a middle part?
Bobs and long layers pair naturally with a middle parting hairstyle, since the even split lets face-framing pieces fall symmetrically. The article covers collarbone-to-shoulder cuts, textured layers, and curtain shapes that all rely on that center line to keep the frame balanced. Personal preference and daily styling time matter more than any single cut name.
Does hair look better parted in the middle or on the side?
Both can work; the article treats middle parting hairstyles as one option among many, with the advantage that you can sweep a middle part aside and the layers still fall into place. Side parts add asymmetry that some faces need, while middle parts give the soft curtain frame the article spends most of its length describing.
How do you style hair split in the middle?
Blow-dry forward first to build root volume, then open the part and sweep the hair away from your face with your fingers while it is still warm. Finish with a light styling cream or sea salt spray depending on whether you want polished movement or rougher texture. The exact product shifts by style: cream for soft middle parts, pomade for slicked-back versions, clay for mullets.
Does a middle part make you look younger or older?
The styling matters more than the part itself. Loose, messy middle parts with texture read younger and more energetic, while flat, severe middle parts suppress volume and can look harder. The article notes that controlled disorder separates messy from lazy, which is the same distinction that drives age perception.
How long does your hair need to be for a middle part?
The front needs to reach at least the tip of your nose when pulled straight down for the part to lift into its soft M-shaped curve at the hairline. Past-the-ears length is the workable minimum for flowing styles; anything shorter fights the part rather than working with it. For a true curtain shape, eyebrow or cheekbone length gives the weight needed to split naturally.